New versions of stuffed peppers and biscotti

Cooking is all about flexibility for me. I do take some pretty serious notes when I’m creating new dishes, or fiddling with old ones. (Most of the time, anyway.) Therefore, I can usually recreate a favorite dish fairly accurately, if that’s what we want.

But most of the time I’m looking for new twists. So here are a few new versions of some previous posts.


Inspiration for this remake came from my sister Lynne. She’s always made her own stuffed mini peppers, and mentioned using sausage as the filling. I sautéed some minced spicy chicken sausage (1½ fat links) with ½ cup minced onion, a minced clove of garlic, a minced Fresno chile (gotta get past my Fresno obsession). I bound all this goodness together with 1 cup of the homemade ricotta and ½ cup grated parmesan. Then I followed my usual Stuffed Mini Peppers recipe. Definitely a hit: spicy-sweet-salty-creamy all at once.


I also tried them stuffed with orzo and cheese and grilled. Cut the tops off and scoop out the seeds, instead of slicing a side off the peppers lengthwise, so they’ll hold together better. Mix 2 cups cooked orzo with 1/2 cup cream cheese or ricotta, 1/2 cup grated parm, and a few tablespoons of chopped fresh herbs. Stuff the heck out of the peppers and grill them over a medium fire, so the peppers have time to soften before the skins blacken completely. 

One more updated recipe: Lemon-Almond Biscotti. My sister Lynne (yep–same one) made these recently, and it got me in the mood to do some adjusting. My husband’s a big oriole fan (the birds, not the baseball team). He keeps a stash of oranges in the fridge this time of year, and puts orange halves on the deck to attract the sweets-loving birds. I absconded with one of those oranges and switched up the citrus in the biscotti. I also had a handful of pecans to use in place of the almonds. (Follow the basic recipe but substitute the zest of at least one whole orange for the lemon zest, and pecans for the almonds.)

For a little decadence, I melted a half-cup of good chocolate chips with a teaspoon of butter and painted one side of the cooled biscotti. The biscotti were sweeter than the lemon-almond version, thanks to the oranges and the pecans, but not at all overly sweet, even with the chocolate. Next time I’ll double up on the zest (lemon or orange) for more oomph; the flavor is surprisingly subtle.

Posted in appetizers, main courses, sides, veggies | Tagged , , , , , , , , , | Leave a comment

Peas in (and out of) a pod

Last week, Tom and Luke were both on vacation. We spent it at home, playing with friends and occasionally trying (yet again) to teach the puppies to swim. It was the perfect balance of activity and leisure (which doesn’t explain why I only managed one post last week; my apologies).

Now life has returned to normal, such as it is: Tom’s adjusting to a new work schedule; Luke’s shuttling between his kitchen job, soccer coaching, and an occasional chance to referee. Our social life tends to increase in the summer — it’s much easier to meet with friends when you’re not dealing with sub-zero weather and the potential for large quantities of snow — so planning dinner tends to be a nonstarter.

Just because we were able to eat together this week doesn’t mean I actually had time to cook. Put me in a kitchen with a few hours and some fresh ingredients and I’m one blissful gal, but that’s a rare occurrence. Today was a “what’s-in-the-fridge” day, with roughly a half-hour window to cook; in other words, a normal workday. Bonus: the overwhelming heat has left the building (literally — we have no air conditioning), so using the stove is once again a pleasure.

In the fridge: half a ham steak, a handful of snow peas that needed to be eaten soon, the last of some homemade ricotta*, and a drizzle of heavy cream left over from making the ricotta. (It goes without saying that we had a selection of cheeses; this is Wisconsin, after all.) In the freezer: homemade chicken stock and half a bag of frozen tiny peas. I liked playing with the old-fashioned combo of ham and peas by using both the petit peas and the snow peas. The ricotta (and a small amount of cream) added decadent creaminess without an outrageous calorie count.

(*I’ve been attempting to make my own ricotta for a few months now, and have finally, finally succeeded. I’ll post my notes on that soon.)

I’m not big on measuring when I cook, and I never measure when throwing together a quick pasta dish. I’ve given estimated measurements below, but quantities are really up to you. I usually use whole milk instead of heavy cream, but I had extra cream in the house (a rarity). If you use milk, you’ll need two to three times more than the cream. You can leave out the ricotta, or use more and skip the milk/cream. Homemade ricotta melts into the sauce much more smoothly than commercial ricotta does. Use only one type of peas if you wish, but we did like the contrast between the tender baby peas and the crunchy snow peas.

Two-Pea and Ham Pasta

Serves 4

1 1/2 cups fresh snow peas, cut lengthwise into slivers
1 lb. pasta (I used whole wheat rigatoni, but any pasta will do)
2 tbs. olive oil
1 small onion, minced
2 cloves garlic, minced
1 fresno chile or other chile, minced, optional (feel free to ignore my continuing Fresno obsession)
2 cups chopped cooked ham
2-3 tbs. flour
2 cups good chicken stock (use less if you’re not as sauce-obsessed as we are)
½ cup heavy cream
1 cup fresh or frozen baby peas
½ cup ricotta (preferably homemade), optional
salt and pepper
¼ cup slivered fresh basil leaves
grated parmesan, to pass at the table

Bring a large pot of water to boil. Drop in the slivered snow peas and blanch for 1 minute; they should still be crisp. Set them aside (no need to shock them in ice water), leaving the water in the pot. Bring the water back to a boil and add the pasta. Cook until pasta is just barely short of done.

Meanwhile, drizzle the oil into a large skillet over medium-high heat. Add the onion, garlic, and Fresno (if using); cook for a few minutes until the onion is translucent. Add the ham and cook for a minute or two longer, just until the ham is warmed through and starts to have a few small browned patches. Sprinkle with the flour, stir well until all the flour has been absorbed by the fat in the pan, and cook for a minute.

Add the stock and cream and stir well to combine. (If you have time, warm the liquids in the microwave before adding to the pan; it’s not necessary but it does make for a smoother sauce.) Add the frozen peas (no need to thaw first) and cook, stirring, until the peas are hot and the sauce has thickened a bit. Stir in the ricotta and taste the sauce. Add a good amount of black pepper and as much salt as you need.

When the pasta is done, drain it well and stir it into the sauce along with the slivered basil. Cook for another minute to finish cooking the pasta. Serve immediately and pass the parm.

Posted in main courses, pasta, rice, and grains, veggies | Tagged , , | 1 Comment

Pizza: If at first you don’t succeed…

We have Tom’s twin brother and his wife and a few good friends coming to dinner this week, so we were discussing menu options. I’d already prepared a double batch of Nutty Parmesan Shortbreads (May 5, 2011 post) dough. Tom had requested a good old-fashioned pineapple upside down cake, one of the twins’ favorite desserts.

The challenge before us was what to serve in between. We’ve been having perfect summer weather — warm, dry, and sunny. The grill, therefore, was a must.

“Why not grill individual pizzas? We can eat on the deck, and everyone can make their own. I’ve been wanting to try grilled pizza.” That was my suggestion.

Tom’s response: “We may want to stick to something we already know how to make. Let’s do a trial run before we try them with company.”

I had to admit he had a valid point; this was something I’d always wanted to do but hadn’t actually done yet. I did a quick search to make sure I knew the process. Grilled pizzas, like stir-fries, are the 50-yard-dashes of the culinary world. You need to have every ingredient ready and close at hand before you fire up the grill (or stove), since the actual cooking is lightning-fast.

It was early enough in the day, so I got out the flour and yeast and whipped up a batch of pizza dough (actually, the rustic bread dough). We grated cheeses, sliced onions and olives, sautéed a few cups of spinach, thawed the pesto, pepperoni and pizza sauce that live in the freezer.

Once the grill was ready, I rolled out three good-sized pizza crusts and brushed them with olive oil. We brought out all our toppings, grabbed tongs and a spatula, and gathered ‘round the hot coals, excited, hopeful, and very hungry.

Here’s the thing. If you make greedily large pizzas, a foot-in-diameter pizzas, the whole process falls apart. The dough is just too floppy to transfer smoothly. In less than a minute, we had misshapen wads of burned-on-the-bottom, silly-putty-on-the-top dough. Truly hideous, inedible piles of dough.

Luckily, I had, hidden in the back of the fridge, a secret stash of that pre-made pizza dough in a can. I quickly rolled it out and cut it into several six-inch mini-pizzas. We brushed them with oil and lifted them gingerly onto the grates by hand. Success! In less than two minutes, they were crisp and striped with grill marks on the bottom. We brushed the tops with oil, flipped the dough, and set the land speed record adding the toppings. After one minute, we moved them to the top, cooler rack of the grill, closed the lid, and let the cheese melt into gooey goodness.

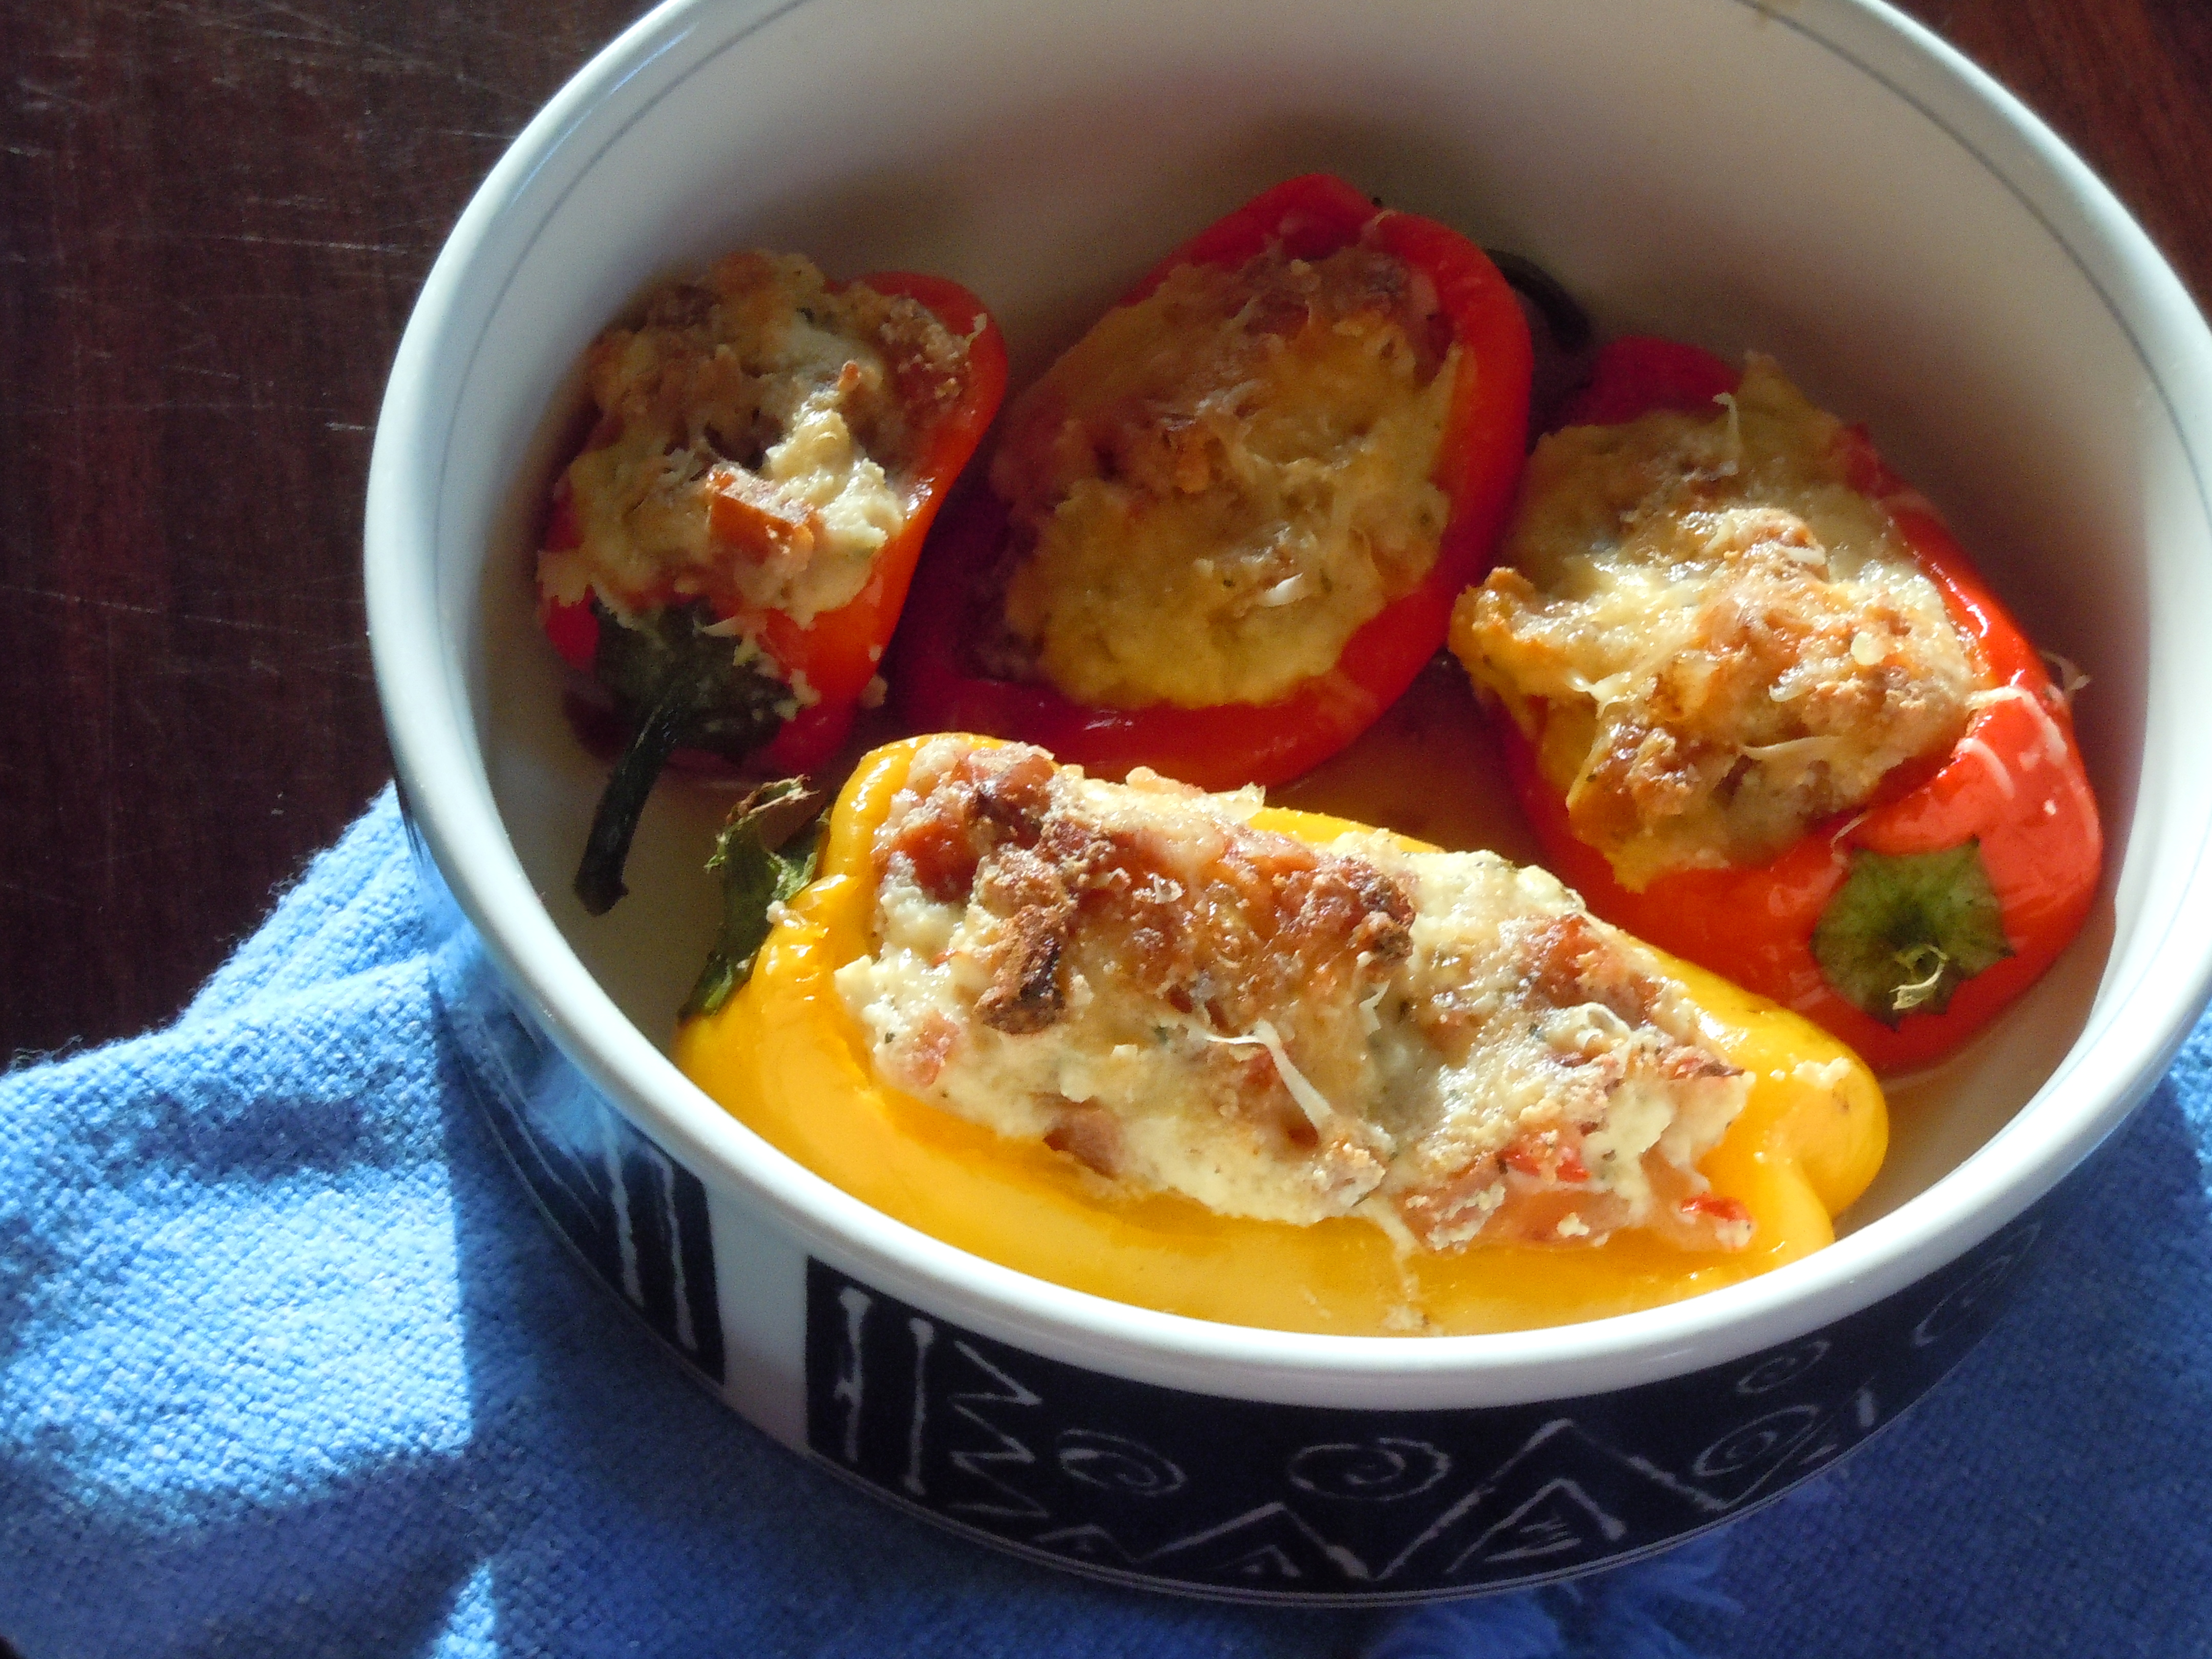
We tend toward extravagance when making our own pizzas, but restraint in the topping department is essential with the grilled versions. They cook so darned fast it’s necessary to keep things as simple as you can bear.

The crusts are crisp yet retain a bit of chewiness, and had the exactly right amount of smoky char. We all agreed that they were some of the best pizzas we’d ever had. That, and the original attempt was one of the most spectacular cooking fails I’ve ever experienced.

We’re making grilled steak with salad for the guests tomorrow, by the way. I think one more round of practice is called for before we foist the pizzas on company, fabulous as they were.

Grilled Pizzas
makes 6 SMALL pizzas (about 6” in diameter)

1 recipe Rustic Bread dough (or your favorite pizza dough, or a can of dough as an emergency)
Toppings of your choice. We used:
1 cup pizza sauce
½ cup pesto (Luke and I like a little of each)
about 3 dozen slices pepperoni (we actually prefer turkey pepperoni)
½ onion, sliced (for Tom)
½ cup sliced calamata olives (for me and Luke)
1 ½ cups shredded mozzarella
½ cup grated parmesan (for me)
1 cup shredded sharp cheddar (for Tom and Luke)
3 cups fresh spinach, sautéed just until barely wilted in a few teaspoons olive oil
1/3 cup olive oil, for brushing crusts

Prepare a grill and wait until it’s medium-hot. While you’re waiting, get all of your toppings ready and right next to the grill. Also have the oil in a bowl with a pastry brush. If you have a Weber-style, wire rack grill, you may need to cook the crusts on a sheet of aluminum foil, or on the type of grill pan designed for veggies. Our grill has cast-iron grates with small spaces between the bars, so the dough didn’t fall into the fire.

Roll out your dough and cut or form into 5 or 6 small, fairly thin circles (or any shape you want). Brush with oil and gently transfer them, oiled side down, to the grill. Don’t leave the grill for any reason. These guys cook crazy-fast. Immediately brush the tops with more oil. After 1 minute, start peeking at the undersides.

When the undersides are crisp and striped with grill marks, flip the crusts and immediately add the toppings. (This is why you need to limit the ingredients — there’s no time to be elaborate here.) Peek again at the undersides. If  the bottoms are done but the cheese is not melted, move the pizzas to a cooler part of the grill for a few minutes.

Posted in baked goods, main courses | Tagged , , , , | 6 Comments

Drinkable berries: homemade strawberry sorbet soda

Strawberry season — finally! There’s nothing on this green earth like the scent of a strawberry still warm from the field. And that color, that glowing ruby red right through to the center — now that’s a perfect strawberry.

The girls loved the smell of the berries, but had no interest in eating them. Libby is fond of the mint that I used as a garnish, though, which may be a problem; the mint grows in a pot on my deck, Libby’s favorite spot. Cleo’s more interested in the pot itself. She likes to remove the plants and chew on the planters. Life is always an adventure with Cleo around.

Cleo lounging--on both beds.

Libby, looking a bit confused.

Luke and I are capable of demolishing an entire small watermelon in one sitting, but none of us actually eats all that many fresh strawberries at once. We seem to be more in love with the idea of strawberries than with the berries themselves, so I tend to find ways to cook with them. Since strawberries are the very definition of summer, I like to focus on light and refreshing recipes.

Strawberry sorbet is one of the easiest and fastest dishes to make. It’s exactly the same technique as I used for the blueberry sorbet, and it works for all sorts of fruit (I can’t wait for peaches and nectarines later in the summer). The small amount of sugar and citrus in the sorbet only serve to intensify the essence of the fruit.

Last year, I had the pleasure to be one of the editors for the recently released Homemade Soda by Andrew Schloss (Storey Publishing). It was thanks to Andrew that I thought to try blending some of the strawberry sorbet with sparkling water. I like my sorbet to be mostly fruit with just a touch of sugar syrup, so when I combined the slightly tart sorbet with decidedly unsweet club soda, a bit of extra sugar was called for.

The resulting drink is refreshing and light and really pretty in an almost girly way, yet it’s not at all sugary. Of course, if sugary is what floats your boat, you can certainly add as much sweetener as you want. A bit of minced fresh mint, or a squeeze of orange juice, is also a wonderful addition.

I’ve been wondering about making simple syrup with healthier sweeteners. Has anyone tried using honey or stevia to make a simple syrup? How did it work?

JULY 29, 2011 update: It didn’t occur to me until 5 am today that there’s actually no need to make the sorbet; you can simply purée the strawberries, stir in some club soda and add simple syrup to taste. The advantage to using sorbet is the texture: the drink is thicker, with some substance to it.

If you’re a purist, you can force the strawberry puree through a strainer for a clear soda. I like the chewy bits, myself.

Strawberry Sorbet
makes about 1 quart

1 cup sugar
1 cup water
1 quart fresh strawberries
1 orange

Heat the sugar and water in a small saucepan until the sugar is completely dissolved and the syrup is clear and glossy. There’s no real need to bring to a boil. Set the syrup aside to cool, then pour it into a jar and pop it in the fridge until it’s really cold.

Rinse the strawberries, hull and halve them, and puree them in a food processor or blender. Squeeze in the juice of the orange: juice from a half will boost the strawberries’ flavor; juice from the whole orange will add a distinctive touch of citrus. You can also add a bit of the zest if you wish.

Add the simple syrup. Use enough to make the mixture taste just a tad too sweet; when it’s frozen, the flavors are more subtle. Give it a whirl just to blend and put it back in the fridge to get really cold. Follow the directions on your ice cream maker to create the rosy sorbet.

Strawberry Sorbet Soda
per serving:

½ cup strawberry sorbet
½ cup sparkling water or club soda

Blend the sorbet and water in a food processor or blender (I used a stick blender), pour over ice, and serve. Adjust the amounts to your taste. Add a sprig of mint, or a splash of fresh orange juice if you wish. If you like a sweeter drink, use lemon-lime soda or ginger ale instead of club soda.

Posted in sides, sweet stuff | Tagged , , , , , , , | 10 Comments

Galette: the no-fuss tart for pastry-phobes

I’ve been reading about those free-form tarts called galettes lately. I went through a galette phase years ago, but hadn’t made one recently. The rustic aspect is appealing, as is the complete freedom to fill them with anything the imagination — and the pantry — can come up with. It’s also one of the few crusts I’ve been able to make that doesn’t end up tasting like cardboard (need to work on that; I clearly did not inherit my mom’s piecrust-making genes).

The crust is from The Collection: Simple & Elegant Recipes, a book I co-edited years ago. The Collection is a compilation of recipes from the Attic Angels, a charitable group in Madison, Wisconsin, and boy, those ladies know how to cook. I’ve used their pastry from the Jalapeño Cheese Strudel recipe (fabulous in its own right), and adapted it to a galette. With both butter and sour cream, it’s rich and soft and (most important, to me anyway) very easy to make.

The filling is comprised of what was in the house: a cup of my latest attempt at homemade ricotta, some sour cream (for the ricotta — tasty but still too dry), one lone zucchini and a few bell peppers. I’ve also made sweet galettes with pears or peaches before; this is one very flexible concept. If you do go the sweet route, sprinkle the crust of the finished galette with a little sugar just before popping it in the oven.

Pepper-Zucchini Galette with Cheese

Dough:
1 1/2 cups flour
½ tsp. salt
½ cup (1 stick) butter, softened
½ cup sour cream
Filling:
1 small zucchini, sliced
2 bell peppers (I used 1 red and 1 yellow), thinly sliced
½ cup sliced red onion
2 tbs. olive oil, divided
salt and pepper
1 ¼ cups ricotta (or in my case, 1 cup very dry but tasty ricotta
plus ¼ cup sour cream)
2 tbs. chopped fresh herbs, optional
1 cup grated parmesan or fontina

To make the dough, stir the flour and salt until combined. Mash the butter into the flour with your fingers just until there are no more big pieces. Stir in the sour cream just until blended. Form into a disc, wrap well and refrigerate for at least an hour or (if you’re running late, like I was) 20 minutes in the freezer.

Meanwhile, heat the oven to 375°F. Sauté the veg in the oil until they’re tender. I did each veg separately so I could make the galette look pretty, but you don’t have to. Cooking the veggies first helps to remove some of the excess liquid, so you won’t end up with a soggy crust.

Roll out the pastry to about 1/4-inch thick, in a rough rectangle or circle. Transfer the pastry to a parchment-lined cookie sheet. You can sprinkle the parchment with a handful of cornmeal first, to add a little crunch to the bottom.

Spread the ricotta over the dough to within about an inch and a half of the edge. Sprinkle with the herbs, if you’re adding them, and with ¼ cup of the parmesan. Arrange the veg in a pretty pattern if you’re so inclined, or just pile them on if you’re not. Sprinkle the veg with the remaining parm. Fold the edges of the dough toward the center; a good portion of the filling should be still visible. This is not the time for perfection; a galette is supposed to be rustic and freeform.

Bake for about 30 minutes, until the galette is golden. Cut into wedges and serve warm or at room temperature with a green salad for a light meal, or into slivers as a snack or appetizer.

Posted in appetizers, baked goods, main courses | Tagged , , , , , , , | Leave a comment

A frozen treat for steamy days

Although I’m definitely in possession of a serious sweet tooth, I’m generally not a big fan of fruit. Veggies fill my requirements for that slot on the ole food pyramid; give me a ruby red pepper or a fresh bunch of spinach any day.

But when you can get fresh fruit in the summer, it’s time to indulge. I usually make granita, which can be whipped up in a matter of minutes, with a minimum of ingredients, and needs only a blender or food processor and a metal baking dish. Granita is similar to Italian ice, but more intensely flavored. It is the essence of fruit.

But Tom gave me an ice cream maker for my birthday earlier this year. Granita processed in an ice cream maker becomes sorbet.

It was Strawberry Fest here this weekend. The local strawberries would really have preferred it if we’d waited a week or two; they’re still tiny green buds. Strawberries are best when they’re local and if possible, still warm from the field.

The lack of strawberries broke my resolve to buy local; I bought a couple of pints of seriously non-local blueberries. First on the agenda — the aptly named simple syrup: equal parts sugar and water, heated until the sugar is completely dissolved. That’s it. Pop it in the fridge and it’ll keep for many weeks. Simple syrup is the base for any granita or sorbet. You can add some fresh mint (or other herbs) or citrus zest as the syrup develops, for another layer of flavor, but the plain stuff is just fine too.

You’ll also need a bit of acid, which acts much  as salt does to intensify the fruit flavor. Lemon juice is delicious, and works with most fruits. But other citrus works well; try oranges, limes, even tangerines. I used grapefruit juice and added a few strips of grapefruit zest as I made the simple syrup.

Now, as to the main event, you want to use the freshest, most flavorful fruit you can find. After all, granita and sorbet are constructed of not much more than fruit, so what you use needs to be the best you can get. One look at  that garnet-colored sorbet tells you how richly flavored it is.

Purée the fruit, add a few tablespoons of citrus juice and some simple syrup. That’s it. For granita, pour the mixture into a metal baking pan and pop it into the freezer. Every half hour or so, stir it with a fork to break up the ice crystals. It’s done in a few hours. For sorbet, chill the mixture and use an ice cream maker. The texture’s a little creamier than the crystalline granita. You can also strain the purée before freezing, but I like the bits of fruit. For an even better texture, add a splash of rum for an adults-only dessert.

Blueberry Granita or Sorbet

1 cup sugar
1 cup water
¼ cup fresh grapefruit juice (if using lemon or lime juice instead, use 2 tablespoons)
2 pints fresh blueberries

In a small saucepan, heat sugar and water over medium heat until the syrup is completely clear and the sugar is dissolved. Set aside to cool. This makes 1 ½ cups of simple syrup, enough for 2 or 3 batches of granita or sorbet. It keeps in the fridge for many weeks.

Once the simple syrup is cool, rinse and pick through the blueberries. Puree them in a food processor or blender. Add the grapefruit juice and half a cup of syrup. Give the food processor a whirl to blend everything, and taste. You want the mixture to be slightly too sweet, as the flavor will be a bit less strong once the mixture is frozen. Add more syrup if necessary.

For granita, pour the mixture into a metal baking pan large enough that the granita is 1½ to 2 ½ inches thick. Cover with plastic wrap and pop the pan into the freezer. Every half hour or so, take the pan out and give the granita a good stir with a fork, breaking up the ice crystals. It’ll be ready in a few hours, and will keep for a few days.

For sorbet, chill the puréed mixture and use an ice cream mixer and process away. Scrape the finished sorbet into covered containers and freeze.

Posted in sweet stuff | Tagged , , , , , , | 2 Comments

Rising to new heights

The girls are hanging at doggie camp for the night. We’re still holding out hope for a trip to New England later this summer. Our wonderful pups have separation issues, so we’re introducing them to the joys of canine sleepovers. Cleo’s been often enough (usually for day care) that she has friends there, but our Libby is more wary; she’s been shuttled off to too many homes in her short life to feel secure with us yet. And I confess that, much as I adore the girls, it is nice to have a break.

Our schedule’s been crazy lately. It’s been days since we’ve all been home for dinner, so I’m pleased to cook for my family tonight. Half an onion, some chopped bell peppers, and a handful of corn kernels went into the skillet for a veggie medley. To accompany these colorful veg, I whipped up a cheese soufflé.

Wait! Come back! I promise, soufflés are easy. Really.

I think the soufflé’s prima donna reputation stems from the fact that that cloudlike texture is easy to attain, but it’s fleeting. Your soufflé will fall, that’s a given; it’s just a matter of serving it before that happens. It is essential that the diners must be seated at the table, forks in hand and napkins in laps, when the soufflé comes out of the oven. In other words, the diners wait for the soufflé; the soufflé does not wait for the diners. (Yes, that phrase does sound familiar; see Risotto.)

My sixteen-year-old son has made individual chocolate soufflés that are mouthfuls of heaven. (I’ll do a post on the chocolate version in the future.) If you can beat egg whites to stiff peaks and then fold them gently into a base, you have the necessary skills. Use whatever cheeses please you, and try adding a bit of minced cooked ham or cooked spinach that’s been squeezed dry.

Technically, you don’t even need a soufflé dish; any deep, straight-sided, oven-safe dish will do. Butter the dish, dump in a handful of grated parm (or fine breadcrumbs). Tip and swirl the dish so that the parm (or breadcrumbs) sticks to the butter and lines the dish. You now have replaced the slippery surface of the ceramic with a nubbly texture for the batter to cling to as it rises.

Set your eggs out to warm up a little while you prep the remaining ingredients and heat the oven, since room-temperature egg whites will be easier to whip. Make sure your other dishes will be ready before the soufflé is. Grate the cheeses, prep the baking dish, and make your white sauce, since it needs to cool a bit before you add the eggs.

I’m all for keeping the number of dishes to a minimum, but I strongly recommend setting up two small bowls and one large bowl just for the eggs. Crack an egg over one of the small bowls, and let the white slide in. Put the yolk into the other small bowl, and check the white to make sure that it’s pristine. Whites will not whip if there’s even the tiniest speck of fat, and yolks are nothing but sunny globes of fat (okay, and protein). If the white is completely yolk-free, pour it into the spotlessly clean big bowl and grab the next egg. Continue the process, adding whites to the bowl one by one, checking each time. This way, if a yolk breaks while you’re separating an egg, you only have to toss one egg, and not the whole batch.

One last caveat: Don’t open that oven! This is the time to use the window in the oven door to watch the miracle of culinary science as the soufflé soars. Which it will.

Cheddar-Parmesan Soufflé
Serves 4 as a main course

5 large eggs
3 tbs. butter, plus more for greasing dish
½ cup grated parmesan, plus more for prepping dish
1 ¼ cups whole milk
3 tbs. flour
salt and pepper to taste
½ cup grated sharp cheddar

Heat the oven to 350°F. Separate the eggs (see the suggestions above) and set aside. Butter your soufflé dish, then coat with parmesan.

Melt the 3 tbs. butter in a medium saucepan. While the butter melts, pop the milk in the microwave and heat for 1 minute, just until it’s warm. (Warm milk plus roux equals a smooth sauce.) Whisk the flour into the melted butter (this is your roux) and cook for a minute or so over medium heat. You’re not looking for browning here; you just want to eliminate the raw flour taste. Whisk in the warm milk and cook for about 5 minutes over medium heat until the sauce bubbles and thickens. Take it off the heat and whisk in the cheddar and parmesan. Set it aside for a moment.

Beat the egg whites until they reach stiff peaks. This means that when you stop beating and pull out your beater, the whites hold their shape and maybe just the tip of the peaked white bends over a bit.

Leave the whites for a moment and go back to the cheese sauce. Stir a few tablespoons of sauce into the egg yolks to warm them, then whisk the yolks into the sauce. Feel the pan the sauce is in — the sauce can be quite warm, but should not be hot. Let it cool for a few minutes if it is. Add a good, solid scoop of whites to the sauce and stir it in to lighten the sauce. Then very gently fold the whites into the sauce until just barely combined. Pile it into the prepared soufflé dish and put it into the oven. Bake for 30 minutes. Leave the oven closed during that time. If you have to peek, do so through the oven window. After 30 minutes, open the oven and gently, gently shake the dish just a little. It should jiggle but not slosh. Scream “dinner time!” and serve immediately.

Posted in main courses, sides | Tagged , , | 4 Comments

Carla’s cookies, savory style

I received a fabulous gift on Friday. I am eternally grateful to the generous person who sent me a savory cookie sampler from Alchemy by Carla Hall.

Okay, I confess: I did it. I bought the sampler and had it sent to our house. But come on, it’s Carla Hall we’re talking about here! Carla Hall, from Top Chef, and Top Chef All-Stars. My favorite Top Chef contestant ever. Her food is elegant and sophisticated, yet always without pretension, like the chef herself.

Carla brought her years of catering experience to bear when creating Alchemy, a mail-order business currently specializing in sweet and savory mini cookies, which she calls “petite bites of love made for sharing.” She’s planning to open a café in Washington, DC soon. We lived in DC for a decade; sounds like it’ll be time for a visit.

The savory cookie collection consists of Cheddar-Pecan, Parmesan Shortbread, Goat Cheese with Dried Cranberries, Smoky Blue Cheese-Walnut, and Spiced Nuts (not cookies but pecans, walnuts and almonds seasoned with brown sugar and harissa). They’re all packed in a silver cookie tin. Inside, the cookies are wrapped in clever paper boxes, nestled in more shredded paper. (We couldn’t wait and dove right in; hence the photo above shows the partially empty boxes minus the pretty packing material.)

The cookies are all delicious, of course; did you expect less? But wait, there’s more: the flavors are layered. When you bite into, for example, a Parmesan Shortbread, you first taste the butter with a touch of salt, then in comes the parm, and at the end is the clean, green hint of thyme. You taste every ingredient (organic only, by the way), and they meld beautifully, but there’s a complex progression involved. How, you ask? (Well, I ask, anyway.) How can such a tiny morsel pack such an array of consecutive flavors? I wish I knew, but certainly the attention to details and impeccable ingredients don’t hurt. Ultimately, cooking with love wins out.

P.S.: I want to give a shout-out to King Berry, the nursery/farmers’ market where I bought the flawless asparagus for my Asparagus-Prosciutto Pizza. Their produce and plants are always lovely. Can’t wait for strawberry season!

Posted in appetizers, baked goods | Tagged , , , | 3 Comments

In the swim with bananas and chocolate

Since we seem to have gone from early spring straight into steamy summer, Tom decided it was time to introduce our dogs to our best real estate asset: the river in our backyard. After all, Libby’s half Lab and Cleo has webbed paws. We figured that with their innate natural abilities and the stifling heat, this was a no-brainer.

The girls were less than enthused.

Libby & Cleo ignoring the river

We took Libby first, assuming that she’d jump at the chance (pun intended) to get in that lovely cool water. We might as well have asked her to jump out of an airplane. She was horrified.

We brought Cleo down, thinking that Miss Alpha Bossypants might just show Libby what fun swimming really was. Not a chance.

Although the river is fairly shallow at the shore, there is a bit of a drop-off. Luke had the brilliant idea to add a makeshift ramp. Tom stood in the water and persuaded, Luke nonchalantly dragged Libs down the ramp, and I encouraged Cleo to explore the shore.

With patience and lots of encouragement, Cleo dunked her head and front paws, and our brave Libby plunged right in. And right back out again, but still. We were thrilled, and the girls were pretty pleased too.

I’ve been trying to connect this with my planned recipe for banana-chocolate chip cake. Here’s all that I can come up with: This cake, although sweet, decadent and contains chocolate, is actually healthy, in a dessert kind of way. It has no fat other than what’s in the eggs and chocolate, and I’ve added a bit of whole wheat flour. So, maybe it’s a good treat for bathing suit season? Does that work? Anyway, it’s guiltlessly luscious. Chocolate and bananas are a time-tested combo, and the little bit of sugar on the top adds a delicate crunch.

I found this cake on Orangette’s blog; she adapted it from Everybody Likes Sandwiches; actually, the links (and versions) of this cake go on forever. I substituted wheat flour for 1/4 cup of the AP flour, and lessened the sugar by just a tad, since overripe bananas are incredibly sweet already. You’d think that 2 whole teaspoons of cinnamon would be overwhelming, but it’s surprisingly subtle. The original cake is made in a 9-inch-square pan, but with my balky oven, the edges were a bit dry by the time the center cooked, so I went up one pan size.

The whole thing goes together in minutes, even faster if you skip my changes and just go with all AP flour and all white sugar. Once, when someone had absconded with the chocolate chips (you know who you are!) and I had a serious craving for this cake, I chopped up the two chocolate bars I had in the house (dark with chilis, semisweet with sea salt) and it was still fabulous.

Banana-Chocolate Chip Cake

1 1/4 cups unbleached flour
1/4 cup whole wheat flour (or just use 1 1/2 cups total unbleached)
1 tsp. baking soda
1/2 tsp. salt
2 tsp. cinnamon (seriously!)
3 very ripe large bananas (I’ve used 3 1/2 small bananas also)
2 eggs
1/4 cup packed brown sugar
scant 3/4 cup white sugar
1 tsp. vanilla extract
3/4 cup semisweet chocolate chips
topping:
2 tbs. white sugar (or demerara sugar)
1/4 tsp. cinnamon
1/4 cup chocolate chips

Heat the oven to 375 degrees F. Grease a 7 x 11-inch pan.

In a small bowl, stir together the flours, baking soda, salt, and cinnamon. In a tiny bowl, stir together the sugar and cinnamon for the topping.

In a large bowl, mash the bananas. (I just beat them for a moment with electric mixer on low.) Beat in the eggs, then the sugars and vanilla. Stir in the flour mixture just until combined, then add the chocolate chips. Pour the batter into the prepared bowl, sprinkle with the extra chocolate and then with the cinnamon-sugar. Bake for about 30 minutes until a toothpick inserted in the center comes out with moist crumbs and gooey chocolate clinging to it. It’ll be delicious for a good three days, if you can resist that long.

Posted in baked goods, sweet stuff | Tagged , , , , | 3 Comments

Asparagus in the raw

We finally had a fleeting glimpse of summer; it reached 89 degrees yesterday, and the mid-80s today. The garden is growing so quickly you can almost watch the leaves unfurling.

Our first lilies of the valley!

I’ve planted seeds for zinnias, cosmos, nasturtium, basil and parsley. Something is sprouting there, but I can’t tell yet whether it’s what I planted or a healthy crop of weeds (far more likely). I just have to wait until I can recognize what’s growing, and then most likely have a weeding marathon.

Speaking of weeds and gardens, I just finished proofreading Brett Laidlaw’s new cookbook, called Trout Caviar after his eponymous food blog. He finds delectable uses for some of the weeds in his garden (such as stinging nettles), but also cooks with food he grows, forages, and buys from local purveyors. He also happens to write like a dream; I was as envious admiring of his essays on life in the Northwoods as I was of his mouthwatering recipes. Look for his book later this year.

Anyway, while I was buying the last of the bedding plants at the farmers’ market, I picked up a gorgeous bunch of local asparagus. A quick search for asparagus recipes sent me, as is so often the case, to Deb at Smitten Kitchen’s site, and her amazing shaved asparagus pizza. I had dough on hand, and the appropriate cheeses, and I’d only need the oven for a brief blast of heat.

The asparagus is peeled — and peeled and peeled, until you have nothing left but a beautiful pile of thin green and white ribbons. It’s tossed with a drizzle of olive oil, a pinch of salt and a few thinly sliced scallions, then piled on a cheese-covered crust and baked in a blisteringly hot oven. The result is light, beautiful, and full of flavor. The pizza is cooked so quickly that some of the asparagus retains its raw crunch, and some becomes brown and crisp.

I layered some shreds of prosciutto under the asparagus. It added a subtle saltiness and a hint of pink peeking out among the green shards.

It was fabulous as is, but I’d also try it with a bit of homemade ricotta and/or pesto as a base layer too. Black olives would be a great stand-in for the prosciutto, as would a bit of crisped pancetta. Give it a try, and let me know what you think. And thanks again to Smitten Kitchen for yet another fabulous inspiration.

Asparagus Prosciutto Pizza

dough for a 12-14-inch pizza
1 lb. fresh asparagus
1 tbs. olive oil, about
1 tsp. lemon juice (from 1/4 lemon), optional
1 good pinch sea salt
1 cup grated parmesan, divided
1 cup grated mozzarella
1 tsp. Aleppo pepper*, optional
2 oz. prosciutto

Heat the oven to 500 degrees F. If you’re using a pizza stone, put it in the cold oven to heat. If not, line a cookie sheet with parchment paper and sprinkle with cornmeal.

Hold a stalk of asparagus by its thick, woody end and cut into long ribbons with a vegetable peeler. Unless you have really thick asparagus and the world’s best peeler, you won’t have flawless, Martha Stewart-worthy ribbons. Don’t worry about it — you just need the pieces to be fairly thin and flexible. Put the asparagus in a bowl, drizzle with olive oil, squeeze on the lemon, and sprinkle with salt. Set aside while you prepare the crust.

Pat your dough out to a circle or rectangle and place on the cookie sheet, or on a peel if you’re using a stone. Sprinkle with 1/2 cup of the parmesan, then with all of the mozzarella. Add the Aleppo, then arrange the prosciutto over the cheese. Mound the asparagus on top, and finish with the last of the parmesan.

Bake for 8 to 10 minutes, until the crust is golden and the asparagus is browned and crisp in spots.

*I get my Aleppo pepper at Penzey’s. Aleppo is a dried chile from Turkey that’s a bit sweeter and smokier than your standard hot red pepper flakes. It contains no seeds, and is not as hot as that old Italian standby. I use a little bit in almost everything.

Posted in main courses, veggies | Tagged , , , , | 5 Comments