Dijon-glazed chicken wings

wings1

I’ve never been a fan of wings. They’re usually too greasy and often drenched in a less-than-stellar barbecue sauce. Fatty, soggy chicken skin is something I usually remove, so wings just seemed like too much work and mess for the tiny bite of meat.

I was shown the light by our friend Jeff, owner of the local bar/restaurant The Wheelhouse. They host great bands on their big deck all summer and have a menu special from the outdoor grill. The kickoff concert is always the Spring Wing Ding Thing. Jeff bakes his wings, then finishes them on the grill. His honey-mustard wings are to die for: spicy, crisp, moist but not greasy.

Once the cold weather kicked in, I started experimenting with wings at home. Several recipes called for added fat in the form of butter or oil. Not only was this unnecessary, it resulted in greasy wings. Nix the fat. Next, I reduced the honey quite a bit. We liked the heat and tang of the mustard to shine; anything more than a touch of honey reduced the “wow!” flavor kick to “meh.” And in a complete turnaround from how I usually cook (more is more!), I eliminated all extra ingredients except wings, mustard, honey, salt, and pepper.

Notes: 1. Cooking the wings on a rack allows the fat to drip onto the sheet pan underneath, keeping the skin crisp. Make sure there is a little space between each wing so air can circulate.
2. Trim the bony wing tips off and roast them too, then toss them in a bag in your freezer. They are a great addition to stock.
3. Season well with salt and pepper, and don’t apply the glaze until the wings are cooked and browned. The skin stays crisp, and the honey doesn’t burn.

IMG_1175

Dijon-Glazed Chicken Wings
makes 12-18 wings, depending on size

5 lbs. bone-in chicken wings
1/2 cup Dijon mustard
1 tsp. honey (or to taste)

Heat oven to 400 degrees F. Place a rack on a large sheet pan. With kitchen shears or a sharp knife, remove the wing tips and set aside. Place the wings on the rack skin side up, spaced evenly. Scatter the wing tips between the wings. Sprinkle liberally with salt and pepper. Roast for 20 minutes. Rotate pan and roast for 20 minutes longer.
In a small bowl, stir together the mustard and honey. Add a few grinds of pepper and stir again. Set aside.
Flip the wings to skin-side down. Sprinkle with salt and pepper and roast for 15 minutes, until lightly browned.
Remove the wing tips and set aside to cool (Those will be used for stock.) Flip the wings to skin-side up and brush with a thin layer of the mustard glaze. Roast for 12 to 15 minutes, until browned. Flip again, brush with glaze, and roast for 5 to 6 minutes. Flip one last time, brush with remaining glaze, and roast for 5 minutes longer. Serve hot or warm.
Posted in appetizers, main courses, meat, poultry,and fish | Leave a comment

Sesame seed ciabatta

IMG_0797

What on earth did we do before Pinterest? Pinners have supplied solutions to household mini-disasters, inspiration for our kitchen and bath remodels, and most often, great recipe suggestions.

I found this ciabatta recipe from Traci Cooks in Austin and decided to give it a try. I am not by any means a bread maker, but her directions were very clear. My first loaf was just slightly overbaked but pretty darned fabulous: a crisp, chewy crust and moist, flavorful interior with an airy texture. I’ve made it several times since then, and it’s only  gotten better.

Then, lo and behold, the technical challenge on The Great British Baking Show (my current binge-watching obsession) was … ciabatta! The method they used was slightly different, but I still picked up some helpful tips. I still use Traci’s directions, but watch to make sure that the bread doesn’t overproof.

Ciabatta does require a few special tools. Because a cup of flour can vary by weight by several ounces depending on humidity and measuring techniques, weighing is the only way to go. You can get a reliable scale for not much cash; I’ve been using this beauty for a few years now. You also do need a stand mixer. Those are not cheap, but this dough is just too wet to knead by hand.

I switch out 50 to 75 grams of the bread flour for whole wheat, without compromising the texture. I also like the texture of the crust better if I skip the oil that Traci uses. The cornmeal adds crunch to the bottom crust and keeps the dough from sticking. The dough is so moist that the salt and sesame seeds stick just fine.

I’ve doubled the recipe to make two loaves so I could send one home with Luke. The bread is so moist and the crust is so firm that it lasts at least two days before you cut into it. Next I’ll try making rolls with the dough, and see how it freezes.

Sesame Seed Ciabatta
makes 1 loaf

250 grams bread flour
1tsp. salt
1 tsp. sugar
1 tsp. yeast
1 cup water
1 large pinch coarse salt
1 heaping tbs. sesame seeds

If it’s a chilly day, set your oven on the lowest temperature, then turn it off after a few minutes. You’re looking for the oven to be no more than 75 degrees. Combine all ingredients in a stand mixer on high, fitted with a paddle. (I keep my flour and yeast in the fridge, so I heat my water for 45 seconds in the microwave.) Mix until the dough climbs up the paddle; this will take about 2-4 minutes. Be patient; it really does completely leave the bowl and wrap itself around that paddle.

Wet your hands with water and slide the dough off the paddle. Insert the dough hook and mix on high for another 3-6 minutes until the dough mostly comes off the sides of the bowl and looks shiny. It will still be wet. Scrape into a large oiled bowl and set aside in your oven for 2-3 hours until TRIPLED in size. If it’s a hot day, this may happen faster.

Dampen your countertop lightly with water. Dampen your hands as well. Scrape the dough out onto the wet counter. Gently flatten a bit; fold into thirds like a letter. Repeat 3 times, rotating 90 degrees each time. Treat the dough gently. Place a very large bowl over the dough and let sit for 45 minutes right on the counter.

Flatten dough slightly and gently, fold in thirds  4 times once again, and let the dough sit for another 30 minutes, covered by the bowl.

Line a cookie sheet with parchment and sprinkle with cornmeal. Very gently form the dough into a long loaf. Gently move the dough to the parchment. The dough will be soft, sticky, shiny, and filled with large holes. Set the oven on 450 degrees F, letting the dough rest for 20 minutes while the oven heats.

Sprinkle the top of the dough with one large pinch of coarse salt and then the sesame seeds. Place the bread into the oven and immediately toss a handful of ice cubes into the bottom of the oven. Shut the door quickly to keep the steam in. Bake for 20 minutes. Rotate the pan 180 degrees and bake for 15 minutes longer. Insert an instant-read thermometer in the bottom of the bread; you’re looking for any temp. over 205 degrees, with a deep brown crust. Put the bread back in the oven if it’s not hot enough.

Cool the loaf on a rack for at least 45 minutes before cutting into it. Once cut, lay the loaf cut-side down on a clean kitchen towel and leave uncovered. This will delay the cut side from drying out, and leaving it unwrapped will keep the crust crisp.

Posted in appetizers | Leave a comment

Cream cheese and chive won tons

8 oz. cream cheese (light, if you wish), softened
2 tbs. heavy cream (or half-and-half)
1/4 cup minced chives
1/4 cup grated parmesan
pinch of salt
18-20 won ton wrappers (or 4-5 egg roll wrappers, cut in quarters)
2 tbs. olive oil

Move a rack in your oven to the lowest setting. Heat the oven to 450 degrees F. Line a cookie sheet with parchment.

Beat cream cheese with cream to thin it. Beat in chives, then parmesan and salt.

Fill a small bowl with water. Lay out several won ton wrappers on a cutting board. Spread 1 rounded teaspoon filling in a stripe down the center, leaving 1/2 inch or so at each end. Dip your fingertip in the water and moisten all four edges of the wrappers. Fold the short ends of each wrapper over the filling, then the long sides, to make a rectangular package. Set each package aside as you finish it.

When they’re all prepared, use a pastry brush to brush each won ton on the sealed side  with oil. Place oiled side down on the prepared cookie sheet. Place on the bottom rack for 6-8 minutes, until well browned on the bottom. Brush the tops with more oil, flip them gently, and bake for another 5-6 minutes until puffed and browned. Let them cool for at least 10 minutes before serving.

Posted in appetizers | Leave a comment

Asparagus-prosciutto rolls

asparaguswraps

Spring is actually here! I prefer to take the higher road here; we still have a few stubborn patches of snow in our yard. Around here, spring means asparagus. I know people who hunt for wild asparagus along country roads. I haven’t done that yet, but I’m tempted.

This dish is something I dreamed up while I was supposed to be meditating during an acupuncture treatment. It was well worth the possible loss of a few peaceful moments. It’s a combination of my asparagus, bacon, and ricotta tart and my latest post, white bean tortilla rolls.

They may look like the white bean rolls, but the flavor is something else again. It’s amazing how flaky the egg roll wrappers become when blasted in a hot oven. Combined with tender asparagus, salty prosciutto and herb-flecked ricotta, these rolls are a perfect package. We’ve had them twice (Tom’s requested them more often) for a light dinner, but they’d be a great appetizer too.

A few tips: it’s worth it to measure the asparagus spears so they’re all the same length. They’ll fit in the egg roll wrappers, and they’ll look pretty. Also, take the time to peel the spears. That skin can be tough, which will make the rolls harder to eat. Don’t worry about being neat when wrapping the spears in prosciutto; they’ll be hidden in the egg roll wrappers.

Asparagus-Prosciutto Rolls
makes 6 rolls

18 thick stalks asparagus (or about 30 very thin stalks)
1 1/2 cups ricotta (preferably homemade)
3-4 scallions, white and green parts, minced
1/4 cup minced parsley
3/4 cup grated parmesan
1/2 tsp. grated lemon zest (more if using store-bought ricotta)
salt and pepper
6 egg roll wrappers
6 slices prosciutto
1 tbs. oil

Heat the oven to 450 degrees F. Line a baking sheet with parchment.

Rinse the asparagus spears. Lay one alongside an egg roll wrapper; trim the end so that the asparagus is just slightly longer than the wrapper. Now trim all the asparagus to the same length. Peel the stalks from just below the tips to the ends. Steam the asparagus, or place them in a large skillet, cover with water, and boil just until crisp-tender, 5 minutes at most. Pull them out and place on a towel to dry.

In a small bowl, stir together the ricotta, scallions, parsley, parmesan, and lemon zest. Taste and season well with salt and pepper. Spread about 1/4 cup on each egg roll wrapper, covering top to bottom but leaving about 1/2 inch uncovered on left and right sides.

Lay 3 stalks (or 5 if using thin asparagus) side by side on a slice of prosciutto and wrap them to hold them together. Carefully lay the bundle on the center of a prepared wrapper, with the tips just over the top edge. Moisten the bare edges of the wrapper with water and fold over. Brush the top with a little oil and place, seam side down, on the baking sheet. Repeat with the remaining asparagus, prosciutto, and wrappers.

Brush the tops lightly with oil. Bake for 8-10 minutes, or until the tops are browned. Gently flip the rolls and bake for 6-8 minutes longer until well browned and crisp on both sides.


Posted in appetizers | 2 Comments

Crisp and creamy white bean tortilla rolls

tortillarollupsbeans

Now that Greek yogurt is available darned near everywhere, I’ve been experimenting with its savory side.  I’ve used it instead of sour cream in ranch dressing. I’ve whisked it with a touch of mayo and a spoonful of dijon mustard to mix into tuna.

Cooking with it is daunting, though. I didn’t want to ruin dinner by having it curdle. But the potential pluses outweighed the risk: added protein, calcium and probiotics with fewer calories and fat than other creamy alternatives.

The perfect recipe appeared (where else?) on Pinterest. Wendy at Weekend Gourmet posted Crispy Chicken Tortilla Rollups with Avocado Crema and made my day. I created a vegetarian version, and tweaked the process here and there.

The Greek yogurt does just what I wanted it to — it melds into a creamy, rich, tangy mouthful. With that intensity of flavor, vast quantities of cheese simply aren’t necessary; one measly cup of grated cheddar is plenty. White kidney beans (cannellini beans) are soft and buttery. They’re balanced with the hot chiles and sweet bell pepper.

When the tortillas are brushed with seasoned oil and quickly toasted in a searingly hot oven, they become crisp (hence the recipe name) and flaky, like pastry. They need very little oil to attain that texture.

This dish can come together in about half an hour, and uses pantry and freezer staples. I stuffed the heck out of the tortillas (we love our filling), but you could less if you prefer. Try them with other types of beans, or with shredded cooked chicken or pork. Serve them with salsa, plain Greek yogurt whisked with hot sauce and a squirt of lemon juice, or the avocado sauce from Weekend Gourmet (below).

Crisp and Creamy White Bean Tortilla Rolls
makes six 8-inch rolls

2 tbs. olive oil
1 small onion, finely chopped
2 cloves garlic, minced
1 red (or orange or yellow) bell pepper, finely chopped
1 fresno or jalapeño chile, minced
salt and pepper
1 can (15 oz.) white beans, rinsed and drained
1 small can green chiles, chopped
8 oz. plain Greek yogurt
1 cup grated sharp cheddar
hot sauce, optional
6 flour tortillas, 8-inch size
Creamy Avocado Sauce
1 small avocado
juice of half a lime
plain Greek yogurt, left over from tortillas
salt and pepper

Heat the oven to 450 degrees F. Line a cookie sheet with parchment.

Pour 1 tbs. of the oil into a skillet over medium-high heat. Add the onion and garlic; sauté for a few minutes until the onion is softened. Add the bell pepper and fresno (or jalapeño) and season lightly with salt and pepper. Sauté, stirring frequently, for another 5-7 minutes until the vegetables are softened and have a few browned spots.

Pour the drained beans into a bowl. Scrape the vegetables over the beans. Don’t rinse the skillet; just place it as is, back on the burner. Shut the burner off and swirl in the second tbs. oil. We’ll use this oil in a minute.

Mash some of the beans with the back of a fork. Stir in a mounded half-cup of the yogurt along with the green chilies and the cheddar. Mix well and taste. Both the yogurt and the beans will go far to mellow the chiles. Add salt, pepper, and hot sauce to taste.

Spread the tortillas on a flat surface. Divide the filling among them, mounding it in a log down the center of each tortilla. Fold edges to cover the filling. Brush lightly with the reserved oil in the skillet. Place tortillas folded sides down on the prepared cookie sheet. Brush the tops lightly with more oil. Sprinkle very lightly with coarse salt, and with a dusting of chili powder if desired.

Bake for 8 minutes. Pull the sheet out  and check; are they browning better on one side? Flip them if they are, brushing them with a little more oil if they look dry. Return them to the oven for another 8-10 minutes until they’re golden and crisp.

While the tortilla rolls toast, make the sauce: Mash the avocado into a small bowl. Squeeze the lime juice over. Stir in the yogurt left over from the filling, above. Season with salt and pepper; taste and adjust seasoning. Add a few dashes of hot sauce if you wish.


Posted in main courses, sauces, vegetarian (or easily adapted to) | Tagged , , , , , , , | 1 Comment

Potato-ham gratin with shallots and cheddar

Potato-hamgratin1

Here’s what I dream of lately*: Gentle ocean breezes. The scent of lilacs in full bloom. The warmth of the sun on my face. My whole face, not just the tip of my nose, which is the only exposed body part in the last three months because it’s been so ridiculously cold.

There have been a few fun moments in this arctic nightmare that is central Wisconsin (and much of the rest of the US, to be fair). We got an invisible fence for Libby and Cleo this fall. The learning curve was a bit steep, but the rewards are great. The dogs love being outside, running loose. Cleo leaps over entire flights of stairs in our terraced yard, and Libby terrorizes squirrels and unearths frozen mice. We’ve loved playing in the snow with them. We’ve especially loved how exhausted they are when they come inside.

Cleo and Libby tunneling for varmints.

Cleo and Libby tunneling for varmints.

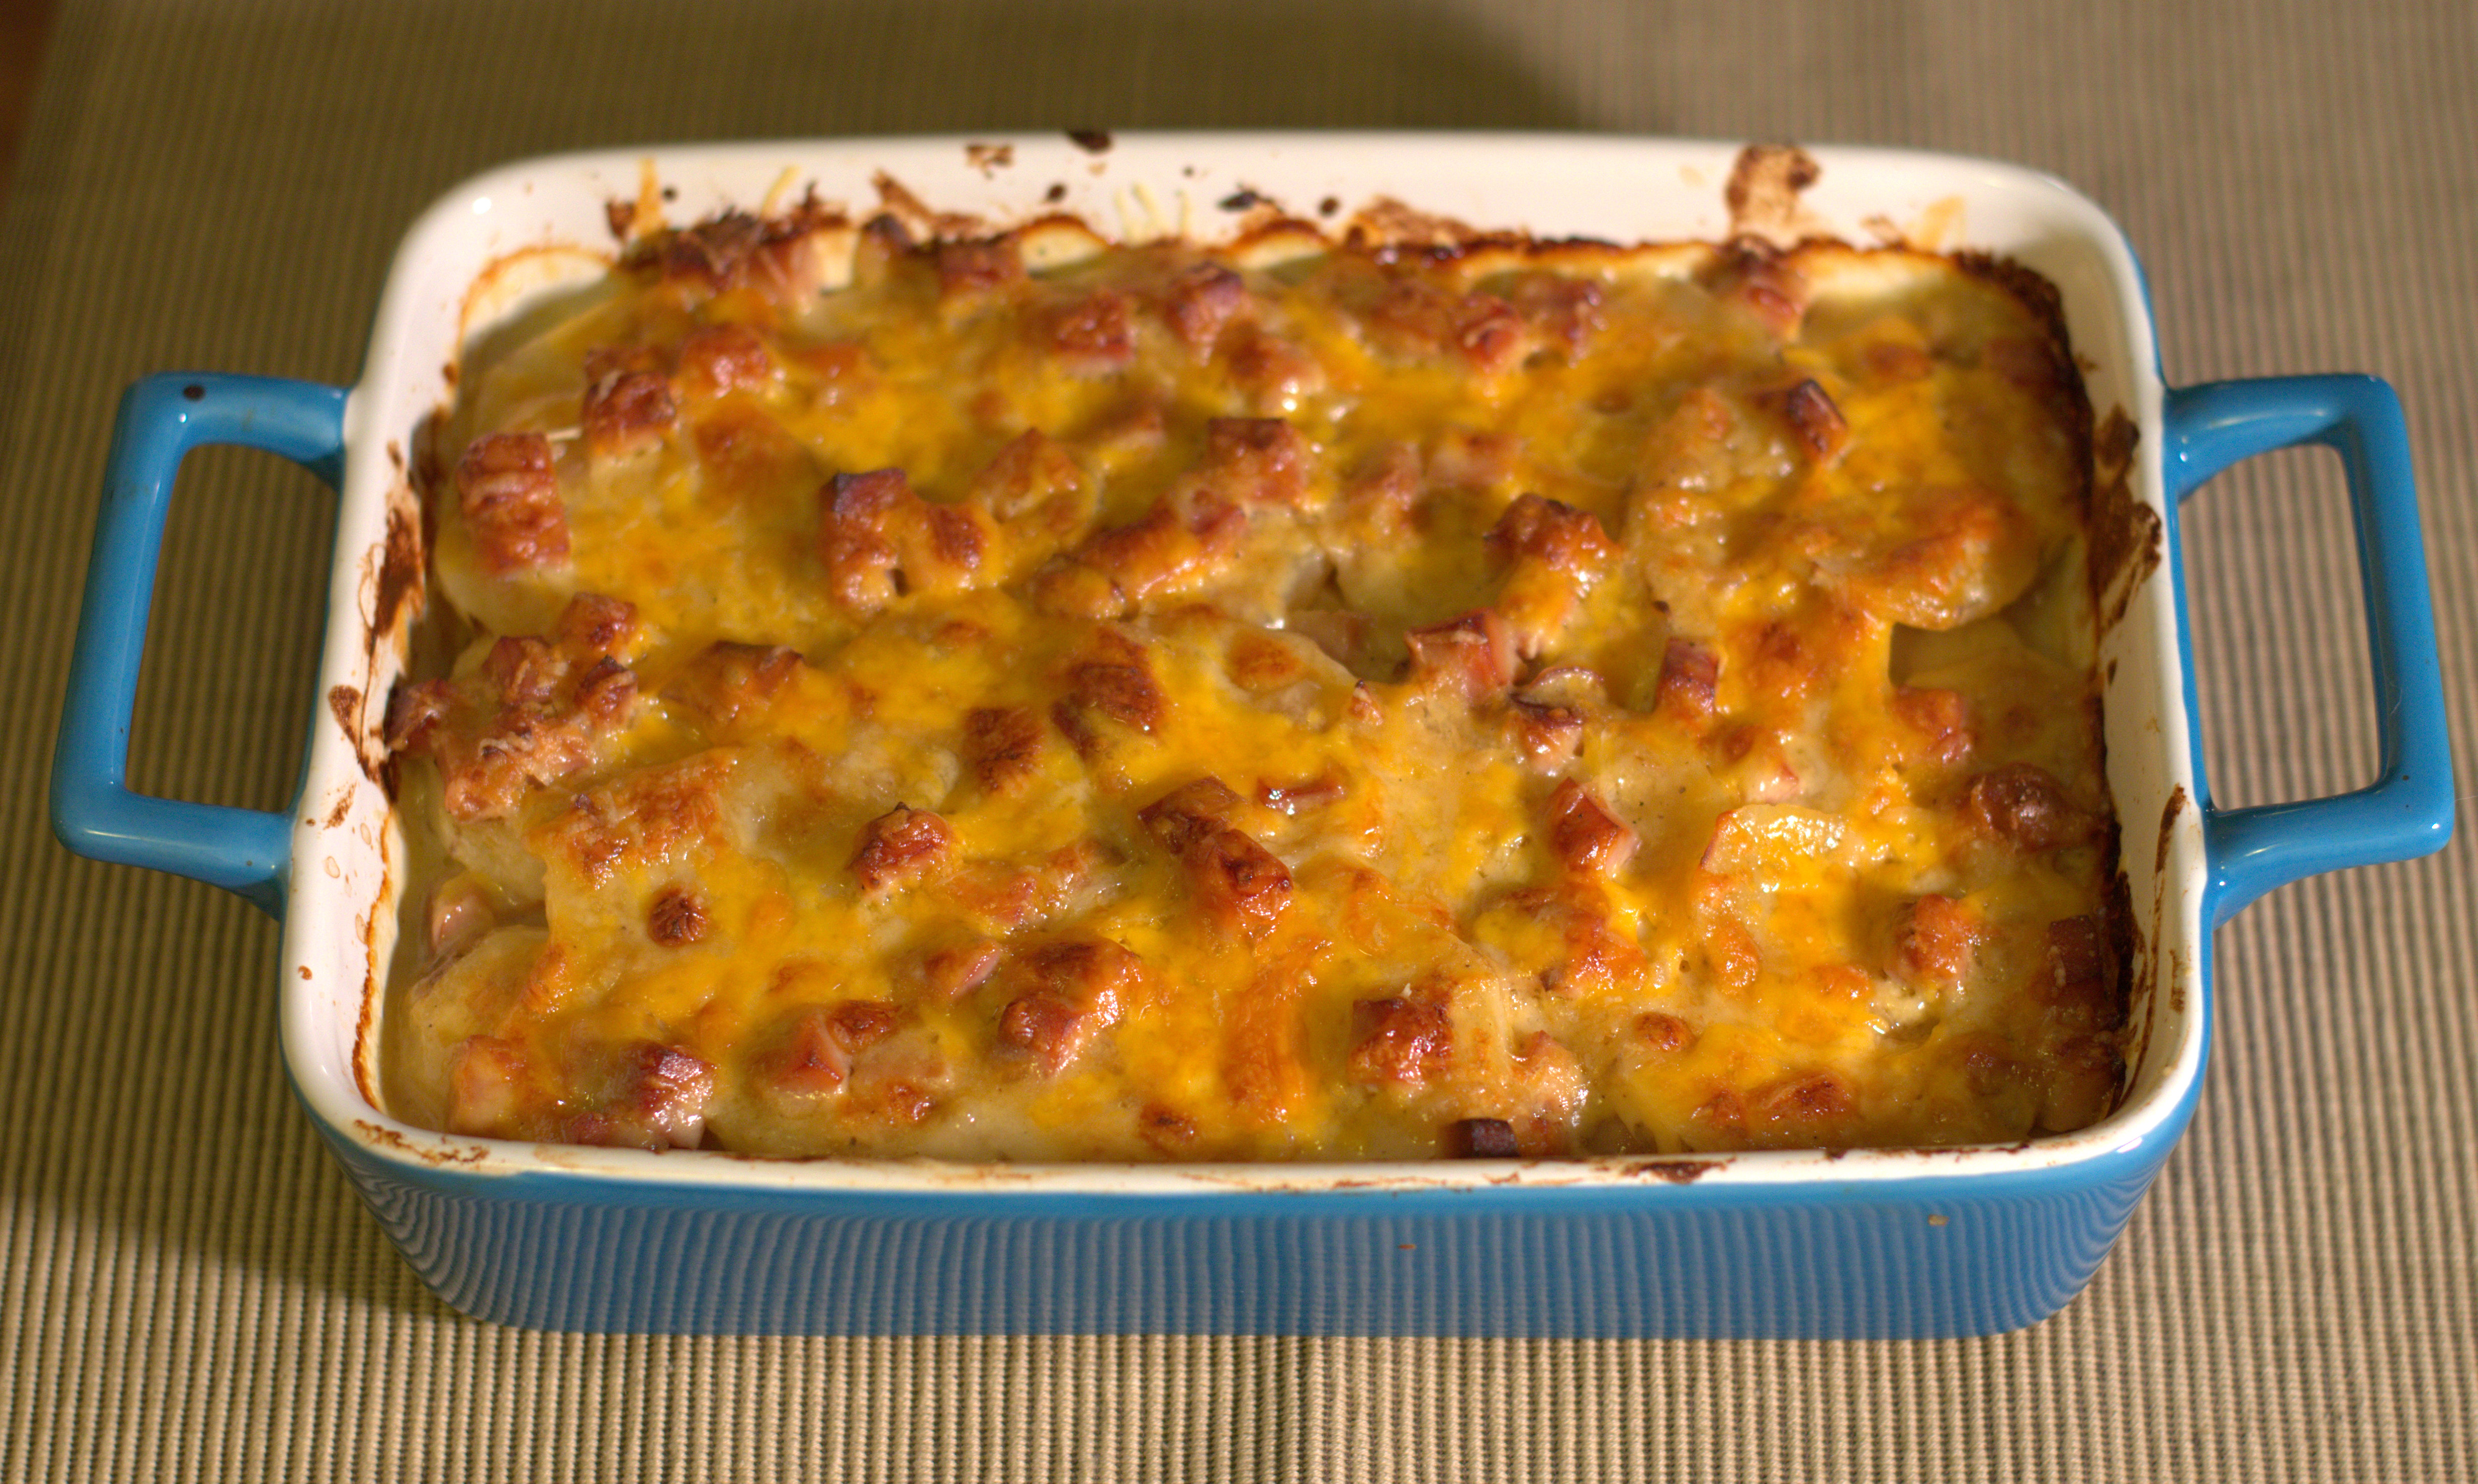
Frigid days are tolerated with liberal applications of comfort food, as we all know. I’ve been roasting a lot of chickens and making vats of soup. Tonight, I made one of Tom’s favorite dishes: potato gratin.

Gratins are tricky, if you’re the type of cook who likes to at least pretend to create healthy food. Leave out the cream and butter and you’ve got a bland, dry dish. One New Year’s Eve I threw out all my scruples and made a potato gratin laden with cheese and heavy cream. It was artery-clogging and I gained a pants size with that one meal, but man, it was fantastic.

Since then I’ve been trying to develop a potato gratin that’s deeply flavored, moist, rich, and not going to send us to the cardiac unit. It’s a tricky balance, and it took a long time. But I’m there.

Starting with a base of shallots and garlic accomplished two things: they both contribute a fair amount of nutrition and, when they’re cooked to golden brown, they add a big ole pile of flavor. I do use butter, but only 2 tablespoons for 4 main-course servings. And there’s the ham — only 2 ounces per serving, but it adds protein and that umami element. Whole milk contributes the creaminess and chicken stock adds depth. And then there’s cheese, of course, but not an overwhelming amount.

The sauce alone is so delectable that we were tempted to just eat a bowl of it. Tom rolled his eyes and groaned when I handed him a spoonful. Layered with sliced potatoes and baked until golden, the result is addictively decadent, yet won’t kill you.

Normally, this is where I tell you you can leave out the ham and use vegetable stock to make it vegetarian. My apologies, but it won’t work here. That ham adds the umami finish that takes the gratin from fine to fantastic.

*This post was delayed by a week. Now our temps are above freezing! We are pathetically grateful.

Potato-Ham Gratin with Shallots and Cheddar
about 4 main-course servings

2 tbs. butter
1 tsp. olive oil
1 large shallot, finely chopped (about 1/3 cup)
1 large clove garlic, minced
1/2 tsp. dried thyme (or 1 1/2 tsp. fresh)
salt and pepper
8 oz. diced cooked ham
2 tbs. flour
1 cup chicken stock
1 cup whole milk
1 1/2 cups grated sharp cheddar
2 lbs. potatoes

Heat the oven to 375 degrees F. Generously butter a 9-inch cake pan or casserole.

Melt the butter and oil in a medium skillet over medium heat. (The oil is there to keep the butter from burning.) Add the shallot, garlic and thyme. (If using fresh thyme, add it later.) Season lightly with salt and pepper. Sauté for about 10 minutes until the shallot is tender and browned. Add the ham and sauté for a few minutes longer, just until warm. Stir in the flour.

Warm the stock and milk in a microwave for a minute. Pour into the skillet, stirring well. Keep stirring until the liquid is incorporated, smooth, and slightly thickened, 3-5 minutes. Shut off the heat and stir in about 1 cup of the cheese until it’s melted into the sauce.

Peel the potatoes, if you wish, and slice 1/8-inch thick. Spread about a third of the slices in an overlapping layer in the baking pan. Sprinkle lightly with salt and pepper. Spread a generous 1/2 cup of the sauce over the potatoes; it won’t fully cover them. Add another overlapping layer of potatoes, season, and another 1/2 cup of the sauce. Add the last of the potatoes.  Pour the remaining sauce over the potatoes, spreading it to cover as much as possible. Sprinkle the remaining 1/2 cup cheese over the top.

Cover with foil and bake for 30 minutes. Remove foil and bake for an additional 30 minutes, or until the potatoes are very tender and the top is browned.

Posted in main courses, sides | Tagged , , , | 1 Comment

uber-broccoli soup with cheddar

broccsoupspoon1

I apologize for posting two soups in a row, but this is soup season, isn’t it? This is one of the first recipes I created when I moved to Boston after college. It’s evolved over the years, but remains one of our favorites.

In the early days of culinary experimentation, I made a lot of mistakes. One of them was a misguided version of this soup. “I love broccoli; I love carrots. Why not combine them in this soup?” I thought.

I’ll tell you why. This is a puréed soup. When you blend orange and green, you get brown. Not rich, chocolatey brown, no. More like taupe. It’s hard to convince people to eat taupe soup, no matter how delicious it tastes. And I was an art major in college. I should have known.

So now I stick to a monochromatic color palette. I’ve never been fond of soup that’s essentially a bowl of cheese sauce with an occasional broccoli floret floating by. I want the broccoli to be front and center, and I want my soup to be green, not yellow (or taupe!).

Adding spinach is a stroke of genius, if I say so myself. It enhances that lovely green color, mellows the cruciferous nature of the broccoli, and boosts the nutrition level. Sometimes I throw in a handful of frozen green peas as well.

Let’s not forget that this is a broccoli-cheddar soup. We’re not talking juice-fast cleanse here. Cheese is a serious presence, without completely upstaging the veggies.

Cheddar-chive biscuits are a decadently buttery pleasure with this fairly virtuous soup.

broccsoup1

Broccoli Cheddar Soup
makes about 6 servings

1 tbs. olive oil
1 medium onion, chopped
2 cloves garlic, minced
salt and pepper
1 tsp. dried thyme (or 1 tbs. fresh)
1 large bunch broccoli, about 2 lbs. (for about 6 cups florets)
1 small potato, peeled and diced
4 cups chicken stock (or vegetable)
1 1/2 tbs. butter
1 1/2 tbs. flour
1 1/2 cups whole milk
1 cup shredded sharp cheddar
2 cups chopped fresh spinach (about 3 oz.)

Heat the oil in a large stockpot with a lid over medium heat. Add the onion and garlic; season lightly with salt and pepper. Let the onions soften, stirring now and then, while you prep the broccoli.

Cut the stems off the broccoli right below the heads. Finely chop the tender top few inches of the stems (you can peel them first, if you wish). Add the chopped stems to  the pot with the onions. Cut the heads into florets, and halve the larger florets. You should have about 6 cups of small florets.

Once the onions are tender (about 10 minutes), add the florets, the diced potato, and the stock. There will be not quite enough liquid to cover the vegetables; this is fine. Cover the pot, reduce the heat to medium-low, and turn your attention to the cheesy portion of the soup.

Warm the milk in the microwave for 1 minute. In a smaller saucepan, melt the butter over medium heat. Whisk in the flour until smooth. Season lightly with salt and pepper. Cook, stirring, for 1-2 minutes. Whisk in the warm milk. Bring to a boil, whisking frequently. Cook at a low boil for about 3 minutes until thickened. Shut off the heat and whisk in the cheddar.

Check the broccoli. You want it to be tender but still bright green. Stir in the spinach and cook for 1 minute longer, just until the spinach is wilted. Stir in the cheese sauce. Use an immersion (stick) blender to purée the soup. Alternatively, you can purée the soup in batches in a food processor or blender. We like it best with some florets left whole.

This soup freezes very well.

Posted in soups, vegetarian (or easily adapted to) | Tagged , , , , , | 2 Comments

Tomato-white bean soup with chicken

tomatobeanchixsoup+focc

A cause for celebration: our small town has, for the first time, a winter farmers’ market. We can get lovely cold-storage vegetables, home-canned goods, breads, and locally raised meats. We’ve been thrilled to have access to beautiful organic chickens.

I’ve made a lot of soup with these beautiful birds. The stock from them is glorious: so rich it gels when chilled. While Luke was home from college over winter break, we went through batches of wild rice soup, classic chicken soup, and corn chowder.

I’d found a precious source for San Marzano tomatoes (a feat in central Wisconsin) and wanted to see what all the fuss was about. San Marzano canned tomatoes are supposed to be the very best, and indeed they were much closer to fresh summer tomatoes, with much more sweetness than most canned tomatoes have. Organic chickens have more flavor than mass-produced chickens do, so they can hold up to the tomatoes just fine.

The secret ingredient, though, is the parmesan rind. Save those hard end bits (I have them in a bag in the freezer) and toss one in your stockpot next time you’re making a hearty soup. The parmesan won’t completely dissolve, but it adds a rich depth of flavor, just as bones simmered in stock do.

The result is just what I was hoping for — healthy as all get-out, but hearty, rich, and satisfying.

Tomato-White Bean Soup with Chicken
makes about 4 servings

1 medium onion, chopped
2 cloves garlic, minced
2 tbs. olive oil
1 red bell pepper, chopped
1 fresno chile, minced, optional
1 tsp. dried basil (or 1 tbs. fresh*)
1 tsp. Aleppo pepper
salt and pepper
4 cups chicken stock (about)
2 cups tomatoes (I used whole San Marzano canned tomatoes)
1 small rind of Parmesan, 2-3 oz.
1 can white beans, rinsed and drained
2 cups chopped cooked chicken
1/4 cup chopped parsley
parmesan shavings, for serving

Sauté the onion and garlic in the oil in a stockpot over medium heat for about 5 minutes until the onion is tender. Add the bell pepper, chile (if using), dried basil, Aleppo, and a hefty pinch each of salt and pepper. Sauté for another 10 minutes or so, until the peppers are tender.

Add the stock. If you’re using whole tomatoes, squeeze them through your fingers over the pot to crush them, and stir in the tomato liquid. Drop in the parmesan rind. Give the soup a good stir and taste for seasoning; adjust as necessary, remembering that the parmesan will add some salt. Bring to a boil, reduce heat to low, and simmer for about 20 minutes.

Stir in the beans and chicken. Simmer another 10 minutes to blend the flavors. Fish out and discard the parmesan rind before serving. Stir in the parsley and serve with shaved parmesan.

Posted in appetizers | Leave a comment

Cheddar and black pepper skillet focaccia

cheddarfocaccia

A mild Pinterest addiction can really come in handy. My current hairstyle, our recently painted beet-red front door, the necklace I made and am wearing right now — all courtesy of ideas found on Pinterest.

Mostly I pin recipes.  One-Hour Skillet Focaccia, from CrunchyCreamySweet, was a big success. I’ve made it several times now. Each variation has been easy, delicious, and remarkably fast. I can’t quite make it in 60 minutes, but it’s not much more than that.

I’m always trying to make recipes healthier without sacrificing flavor. This bread needs the two tablespoons of olive oil in the dough; otherwise it’s dry. Since I was using cheese on top, I skipped the butter and used only a touch more oil to aid in browning. I also found that, for us at least, a bit more salt was welcome.

I’ve made this with parmesan instead of cheddar, and with a sprinkle of caramelized shallots atop. The black pepper adds a subtle heat, but can be left off. It’s wonderful warm out of the oven, but still great at room temperature. Like most homemade (and therefore preservative-free) breads, it’s best eaten the day it’s made. If you do manage to have leftovers, stale focaccia makes a mean strata.

This speedy version doesn’t have the chewy texture and dense crust of a traditional, slow-rise focaccia. The texture is light and slightly crumbly without being dry, and the crust has a delicate crunch. It’s a terrific accompaniment to stews and soups. (The Tomato-White Bean Soup with Chicken in the photo is an upcoming post.)

Crisp, cheesy, warm bread in just over an hour. What’s not to like?

Cheddar and Black Pepper Skillet Focaccia

adapted from CrunchyCreamySweet

3/4 cup warm water
1/2 tsp. honey
1 1/2 tsp. yeast
1 1/2 cups all-purpose flour (about), divided
3/4 tsp. salt
1/2 tsp. cracked black pepper
2 tbs. plus 1 tsp. olive oil
1/2 cup whole-wheat flour
1 cup grated sharp cheddar

Place the warm water, honey, and yeast in the bowl of a stand mixer and stir to dissolve. Let it sit for a few minutes while you measure the rest of your ingredients; it should start to foam up. Heat the oven to 220 degrees. Shut it off when it reaches temperature, but leave the oven door closed.

Add 1 cup of the all-purpose flour and the salt and mix at medium speed with the dough hook until well incorporated (about 2 minutes), scraping the sides now and then. Add 2 tbs. of the the oil and mix for another minute or so until it’s incorporated, then add the whole wheat flour and 1/4 cup of the remaining all-purpose flour. Mix on medium speed until all the flour is combined in; add more flour if necessary until the dough starts to pull away from the sides. Mix for 3-4 minutes longer until the dough is smooth. It will be soft and slightly sticky.

Lightly oil a 10- or 11-inch cast iron skillet. Stretch the dough into a disk (as if you were making pizza crust). Place it in the skillet and gently stretch again until the dough evenly covers the bottom of the pan and rises just slightly up the sides. Cover the pan with a clean dish towel and place in the warmed oven for 20 minutes.

After the 20-minute rising period is over, take the pan out of the oven. Increase the oven temperature to 450 degrees F. Uncover your pan and gently spread the remaining teaspoon of oil evenly over the dough. Poke the tips of your fingers in the dough to create dimples. Sprinkle with the cheddar and a light dusting of black pepper (about 1/4 tsp.). Re-cover the pan until the oven reaches temperature.

Put the focaccia in the oven and immediately reduce the heat to 425. Bake the focaccia, uncovered, for about 20 minutes until golden. Cool in the pan for 10 minutes, then remove the focaccia from the pan and cool on a rack.

Posted in appetizers, baked goods, vegetarian (or easily adapted to) | Tagged , , , , , , | 4 Comments

Lemony parmesan white bean dip

lemongarlicwhitebeandip2

It’s great to have a few stellar appetizers you can whip up at the last minute from the stash in your pantry and fridge, especially at this time of year. It’s also terrific to have a few tempting and healthy apps in your repertoire. This dip is both.

It’s similar to hummus, but uses tender white beans instead of chickpeas, and parmesan instead of tahini. Like most dips, it’s tasty right away but benefits from a few hours in the fridge, to get those flavors melding.

There’s not a lot of parmesan, just enough to provide a salty hint to the mild beans. The lemon brightens the flavors and balances the creamy texture. A few minutes in the food processor, and you have a dish ready to go.

Chef Art Smith once commented on Top Chef that if your food is bland or needs seasoning, start with a little acid first — then salt. I’ve never forgotten that. Now I try a few drops of lemon juice, vinegar or wine before I add extra salt. Give it a shot and let me know what you think.

In the summer, add a few tablespoons of fresh herbs. I used dried herbs because 1) it’s full-on winter here, and 2) we do not have a single window that gets direct sun, so an indoor herb garden is but a dream. The dip is still darned yummy.

I’ve served it with crisp, sweet carrots (the best I’ve ever had, from Gravel Road Farm), with homemade pita chips, and with pretzel sticks. It’s a creamy, light spread on sandwiches.

Lemony Parmesan White Bean Dip
makes about 1 1/2 cups; easily doubled

1 small clove garlic, minced
salt and pepper
1 can cannellini beans, rinsed and drained
2-3 tbs. fresh lemon juice
2 scallions, thinly sliced
2 tbs. olive oil
1 tsp. dried mixed herbs (I used Penzey’s Tuscan Sunset)
1/3 cup grated parmesan

On a cutting board, sprinkle the minced garlic with a pinch or two of salt. Mash the salt into the garlic with the flat of a knife until it becomes a coarse purée.

Pour the beans into a food processor. Add the garlic, a few grinds of pepper, 2 tbs. of the lemon juice, the scallions, oil, and herbs. Blend, stopping to scrape down the sides now and then, for 2 full minutes. Taste, and adjust the seasoning with more lemon and salt, if necessary. Add the parmesan and pulse to combine. It’s tasty right away, but better if you can let it sit in the fridge for a few hours to allow the flavors to meld.

Serve with vegetables, pita chips, crackers, or tortilla chips; use instead of mayo on a sandwich.

Posted in appetizers, vegetarian (or easily adapted to) | Tagged , , , , , , | 2 Comments