C’mon, summer! A salad to bring it on.

It’s not summer yet. No matter how I parse it, 50 degrees and fiercely windy does not a summer day make, even here in the Frozen Tundra. My pepper and herb plants are sleeping indoors at night, since there’s still a risk of a hard frost.

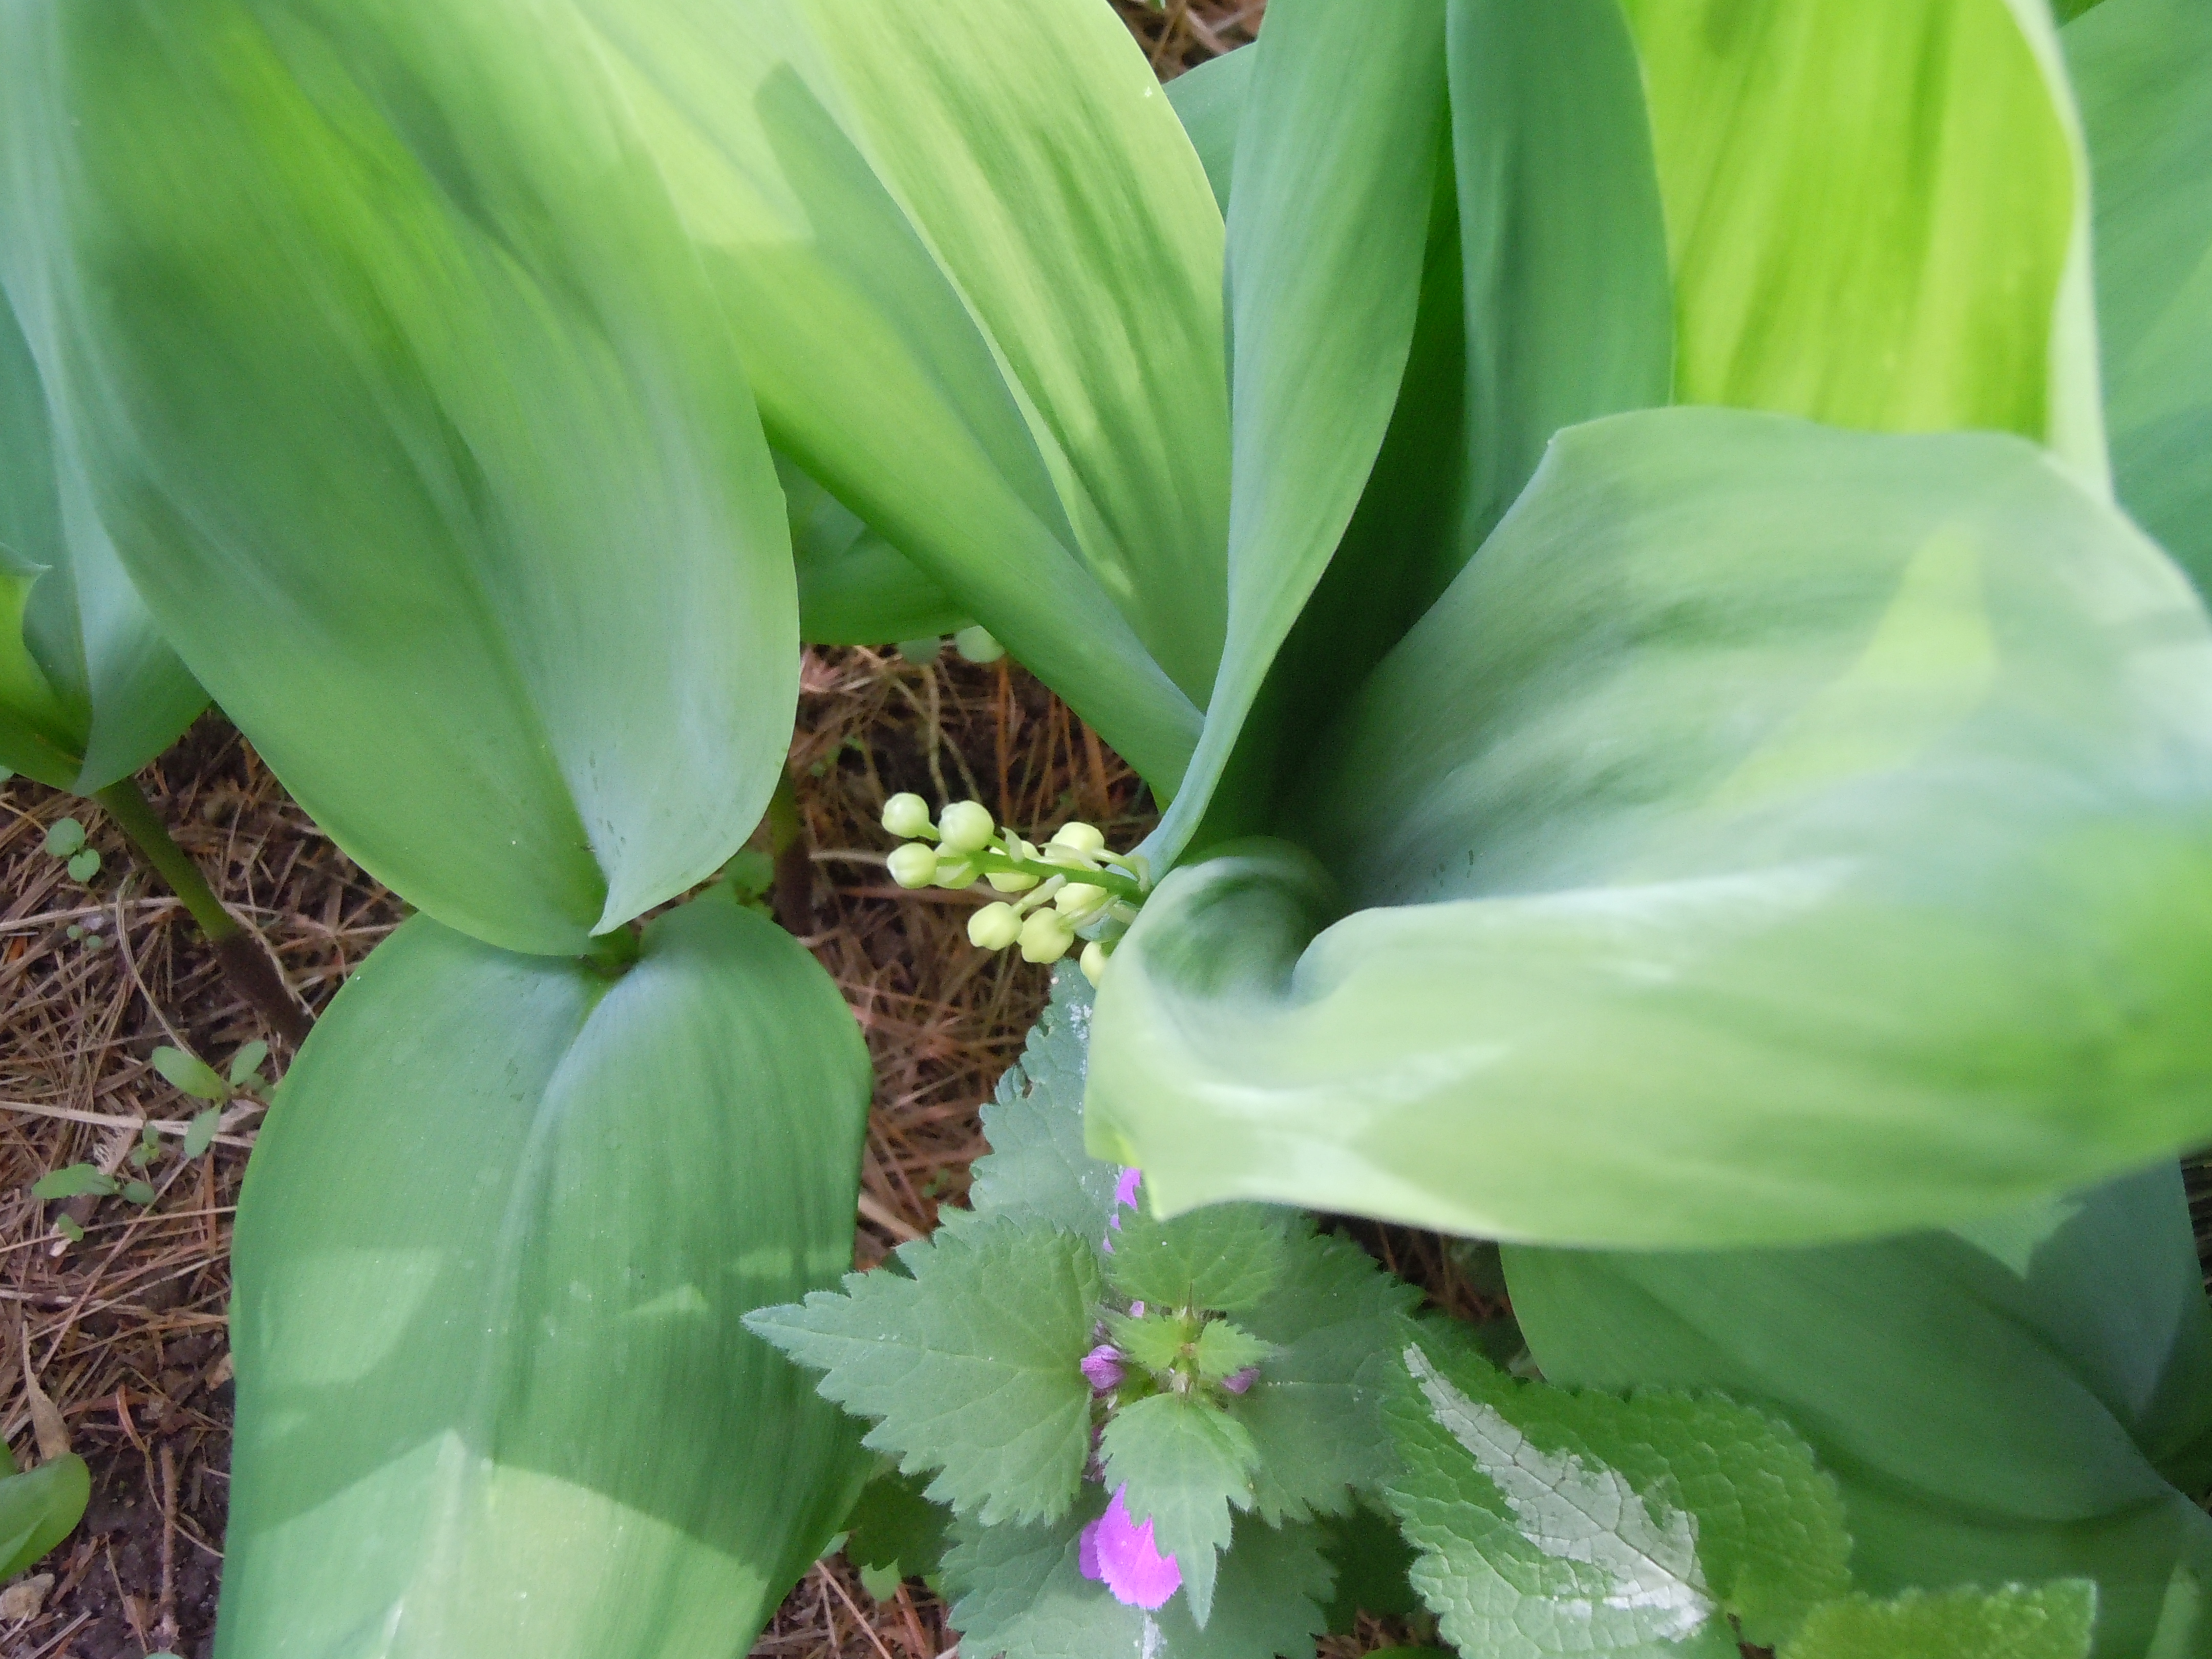
But the violets have been blooming for a few weeks. I’m knocked sideways by the scent of the lilacs when I walk to the end of the drive to get the mail. And overnight the lilies of the valley have sprouted wobbly stalks with fat green buds. Within a few days, our house will be filled with flowers.


Still, Luke doesn’t play his first soccer game of the season until next weekend. Fair warning, Wisconsinites: it almost always snows on opening day. Just so you’re prepared.

I’m taking the glass-half-full approach and making our favorite summer salad. In real summer (as opposed to wishful-thinking summer) it starts with a handful or two of tomatoes still warm from the sun, and a small bouquet of basil, parsley and chives snipped from the pots on my deck. Off-season, I use grape tomatoes. I’m already blowing my chance of winning locavore of the year with the avocados anyway.

The plan is always to serve this salad with dinner. It rarely makes it to the table. It’s best if it’s made an hour or so ahead of time, but Tom and I can’t resist nibbling it as we prepare the rest of dinner. It’s part salsa, part guacamole, but creamier and richer than salsa and lighter and more refreshing than guac. (You know to use those nubbly black-green Hass avocados, right?) The bare-bones version has only tomatoes, avocado, and a scallion or two, seasoned with a drop of balsamic and a drizzle of olive oil. Sometimes I add a smidgen of mashed garlic, a bit of diced red pepper and some fresh herbs, and of course a minced Fresno, because I just can’t get enough of those sweet-hot babies. Anything you add must be a supporting player, there to bring out the best in the stars. However you make it, tomato-avocado salad brings summer right to your table.

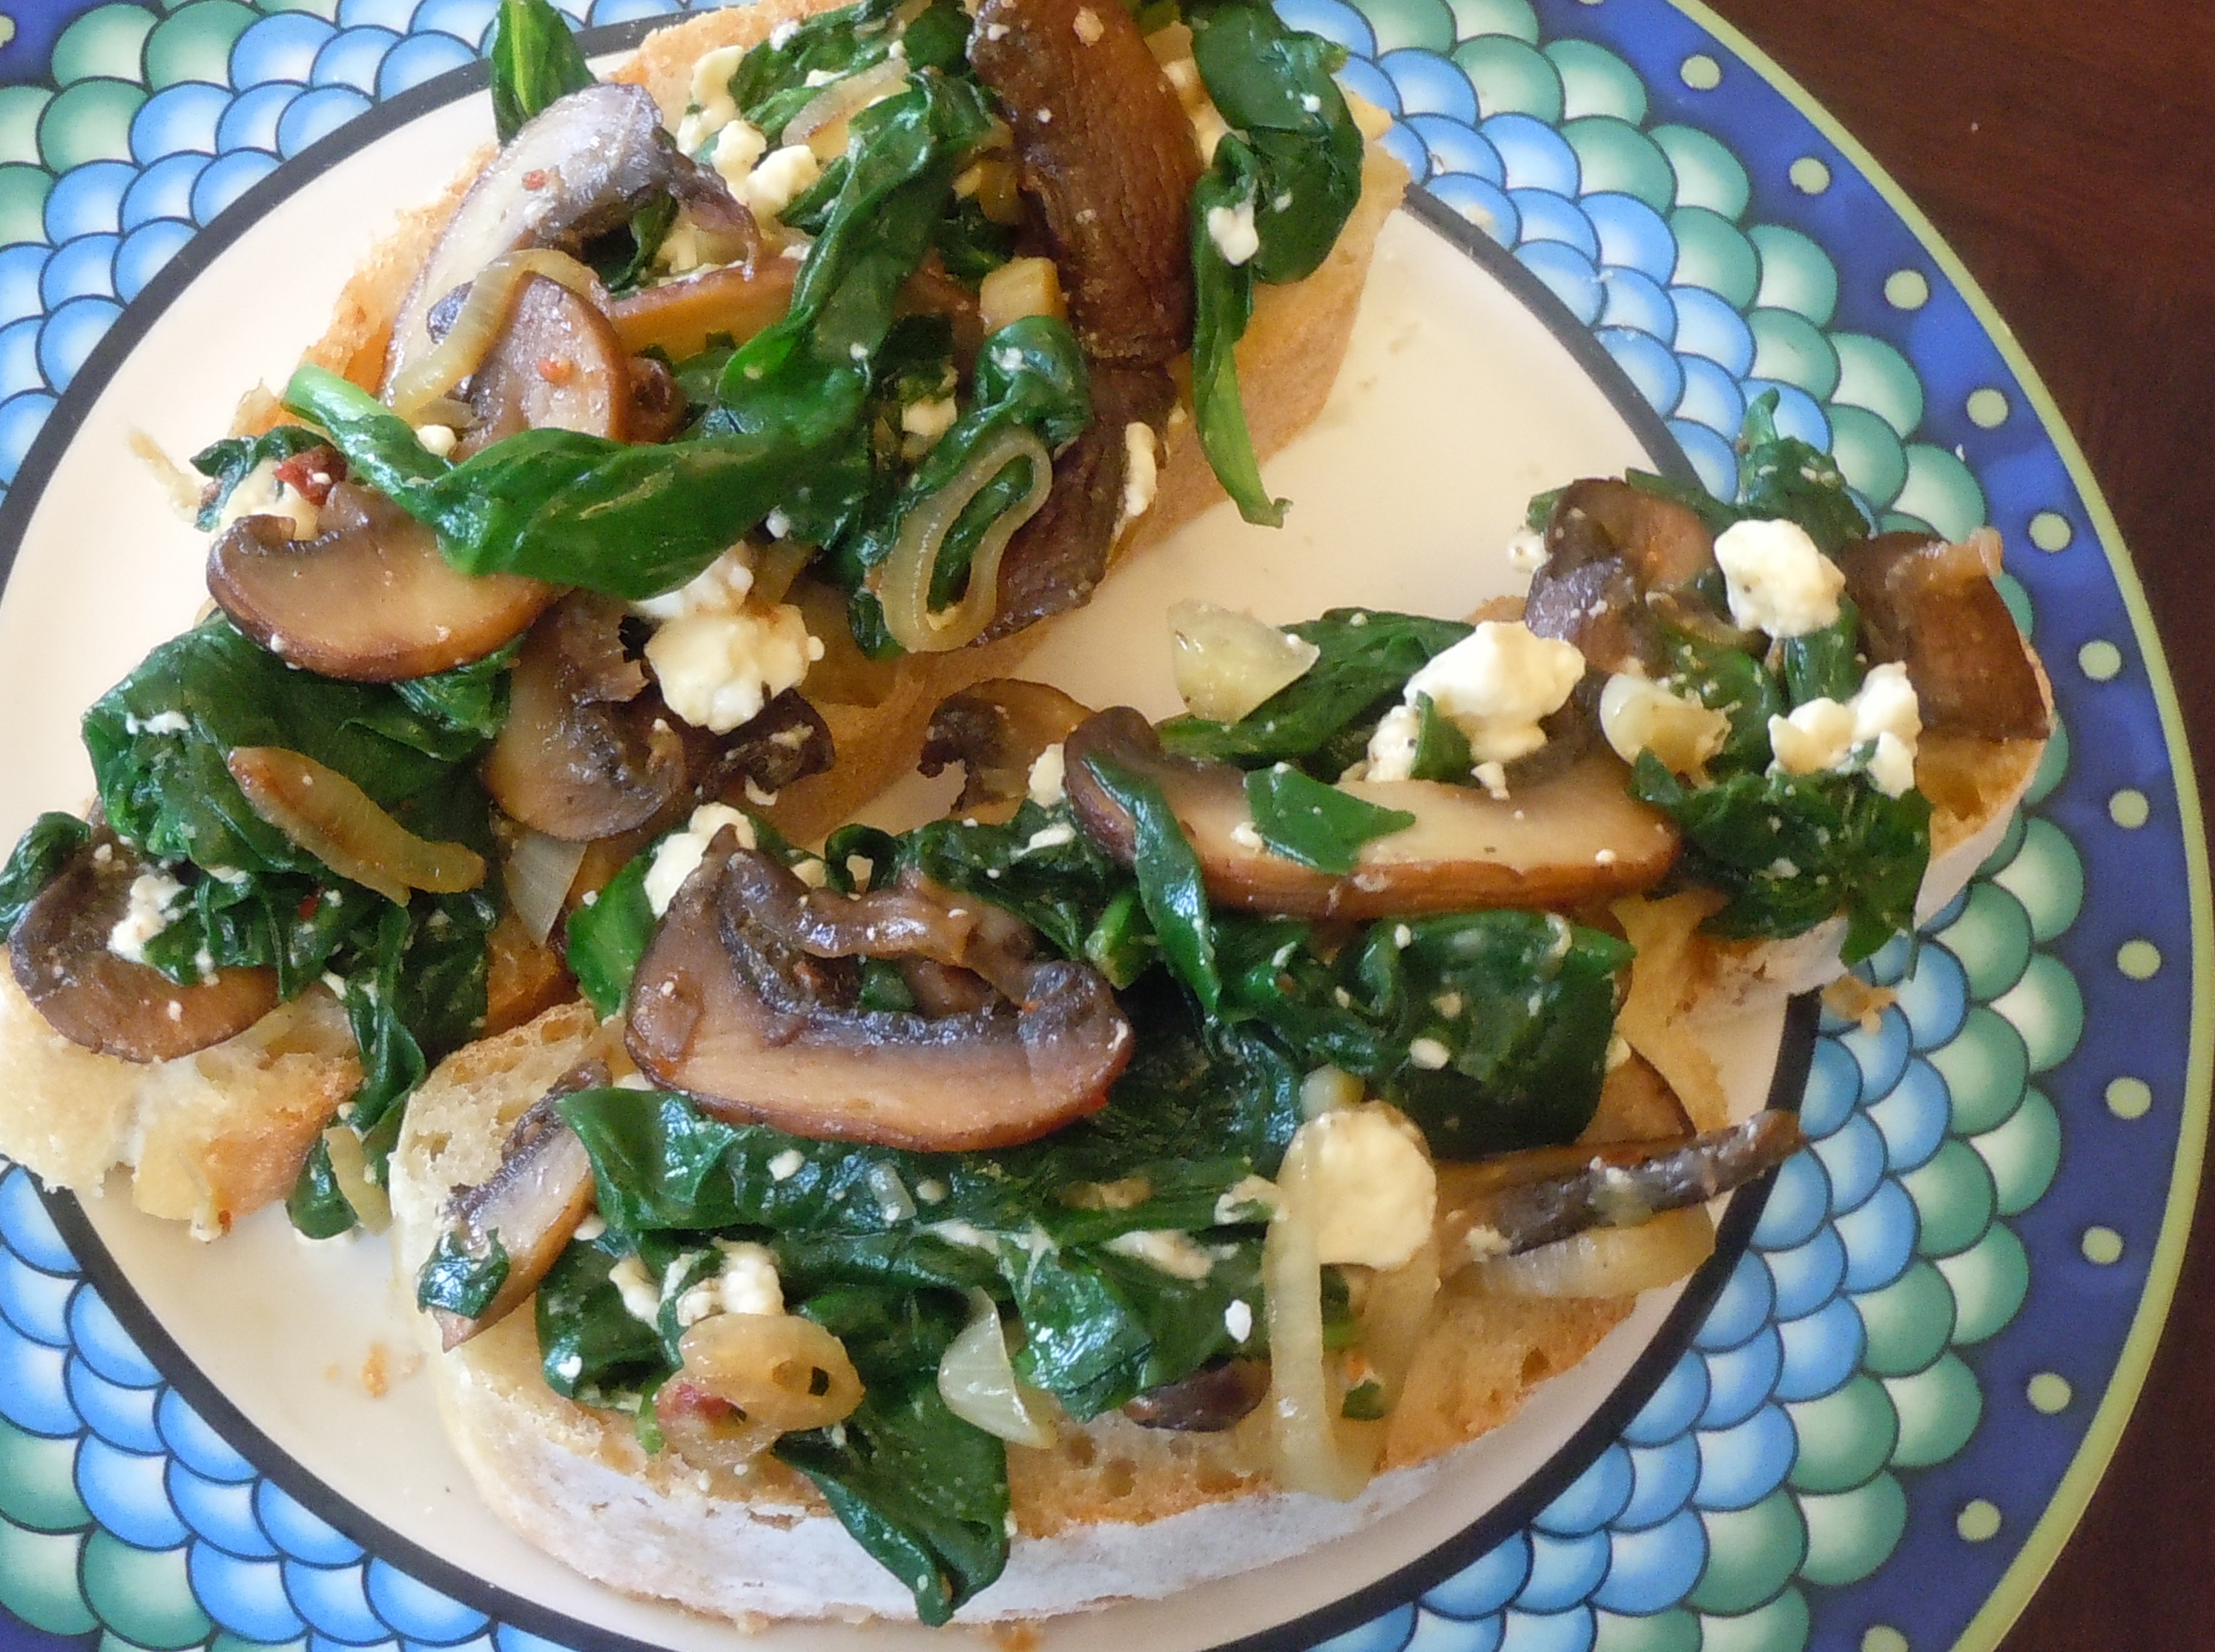
ingredients for tomato-avocado salad

Tomato-Avocado Salad

1 pint grape tomatoes, halved (or 2 beefsteak tomatoes, chopped, or whatever really good fresh tomatoes you can get your hands on)
2 ripe avocados, diced
2-3 scallions, minced (or a tablespoon of minced shallot or red onion)
1 teaspoon balsamic vinegar (at most)
2 tablespoons olive oil (at most)
1 small clove garlic, mashed to a paste with salt, optional
1 tablespoon chopped fresh parsley, basil, thyme, and/or chives
salt and pepper to taste

Gently stir everything together. It’s best if you let the salad sit at room temperature for an hour or so, but it’s still delectable if you can’t wait that long. It’s also perfect piled on corn chips, or as a topping for tacos, or tucked inside an omelet, with or without cheese. (Who am I kidding? I never choose “without” when it comes to cheese.) And it’s irresistible spooned right out of the bowl.

Posted in sides, veggies | Tagged , | Leave a comment

A lighter (?) version of garlic bread

Parmesan-Garlic Toasts

Tonight was fish night in our house. What this means is I have a piece of fish that I usually prepare with an herb crust; Tom has Mrs. Paul’s (fish sticks or fillets), and Luke has chicken sausage. My guys are not huge fish fans. The girls, however, love it. The two dogs were in rapt attendance during the whole meal, hoping I’d break down and share.

I put a pan of broccoli in the oven to roast, started the fish on its merry way, and grabbed a baguette Tom had picked up that morning. We were having parmesan-garlic toasts as our starch.

I try to provide a healthy diet for my family. We’re omnivores and we adore cheese, so we tend to compromise on the whole calories-fats-carbs thing fairly often despite my best efforts. The parmesan-garlic butter was a result of trying to lessen the amount of butter on our garlic bread without sacrificing flavor. Granted, we’re substituting cheese, but my rationale is that hard cheese has less fat than butter. I told you I was willing to compromise.

The idea is to use a small amount of softened butter, stir in as much grated parm as it will hold, and add a bit of minced garlic. I then spread a thin layer onto slices of baguette or ciabatta and toast them until they’re golden. The parm-garlic butter is also quite delectable when toasted onto split pitas, bagels, or flour tortillas.

I’ll add chives (garlic and regular) when they’re in full swing. And I’ll use Asiago or a good extra-sharp cheddar instead of the parm for a change of pace. A few grinds of black pepper add a piquant heat.

Parmesan-Garlic Toasts

3 tbs. butter, softened
1 cup grated parmesan, about
1 small clove garlic, minced
10-12 slices of baguette

Heat the broiler. Mash as much parmesan into the butter as it will hold and still stay together as a paste. Stir in the garlic. Spread a thin layer on each baguette slice. Lay the slices on a cookie sheet and broil for a minute or two until the cheese is browned and bubbly. Serve them warm or at room temperature.

Posted in appetizers | Tagged , , , , , | 3 Comments

Fortifying spinach crostini


This was a day of repairs. The fun began at 7 a.m., when I pulled the car out of the garage and noticed the “check engine” light glowing on the dashboard of my nine-year-old Subaru. Luke got in the car and said, “Oh yeah, that light was on last night when I drove home from soccer. I just coasted as much as I could.” I gingerly drove Luke to school — luckily only about five miles round-trip — and called the Subaru dealer as soon as I got home. They were overbooked, but a local garage was able to check out the car and drive me back home while they did so.

While I waited to hear from the garage, I dealt with problem #2: our land line, which had been producing nothing but a busy signal since yesterday afternoon.

Right now, most of you are heartily endorsing my husband’s repeated requests to just ditch the darned land line already. Here’s the thing: Our house phone is through our cable company, along with the internet access and all those great tv stations. For reasons known only to their accounting department, when I’ve tried to eliminate the phone portion of our contract, the price goes UP. Yes folks, it’s cheaper for us to keep the land line than it is to switch to cell phones only.

Four cell phone calls (and numerous jogs up and down stairs to gather and test all the phones) later, we learn that the problem is not with the phones or the line, but with the ancient modem. But I can’t just buy a modem; I have to get a specific modem from the cable company (which they claim will be free), after a home visit from a technician (again, free). So they say. Which means I have to clear a path through my sadly neglected office to the modem.

The car folks called to inform me that a mouse has eaten through a wire in my car’s innards. So now I have to clear out the garage as well, to eliminate any secret mouse hideaways. Last time I cleared out the garage, I found not only a dead mouse, but also a dead snake. Not looking forward to this. At all.

I feel the need for a fortifying lunch, something healthy and fabulously delicious to give me the strength for all this cleaning. I have half a loaf of ciabatta, and some cremini mushrooms, feta, and a bag of baby spinach in the fridge. While the bread is toasting, I sauté some mushrooms and a sliced shallot, then added a few handfuls of spinach. Off heat, I crumble in a chunk of feta, and mound the whole lot onto the toasts. The silky spinach is a lovely contrast to the crisp ciabatta and earthy mushrooms, and the salty feta provids the seasoning. After such a lunch, I may even be able to face down the garage.

Spinach-Cremini Crostini with Feta
1-2 slices good bread (I used ciabatta)
3 cremini mushrooms, sliced (or use any mushrooms you wish)
1 small shallot, chopped
2 tsp. olive oil
1/2 tsp. aleppo pepper
2 big handfuls baby spinach leaves
1 oz. feta, crumbled

Toast or grill the bread lightly on both sides. While the bread is toasting, sauté the mushrooms and shallots in the olive oil over medium-high heat for about 5 minutes, until they’re tender and lightly browned. Sprinkle with the aleppo. Rinse the spinach, shake off some of the water and add to the pan with the remaining water clinging to the leaves. Cook for a couple of minutes, just until the spinach is wilted. Take the pan off the heat, stir in the feta and mound the whole mixture onto the toasts. Enjoy while they’re still warm, and feel your energy levels soar.

Posted in appetizers | Tagged , , , , , | 2 Comments

Anytime biscotti

A few summers ago, two of our dearest friends got married. We hosted a few pre-  and post-wedding gatherings, and many other impromptu dinners on the deck. My idea of a great summer.

I’m not much of a pastry chef (okay, I’m not anything close to a real chef, pastry or otherwise). My go-to dessert all that summer was lemon-almond biscotti served with Nutella and homemade strawberry-orange granita*. These biscotti are not overly sweet, and are also, remarkably, not hard enough to break a tooth. The leftovers (when there are any) make a great light breakfast with some good coffee or tea.

[*I’ll post the granita recipe soon.]

This is my version of Giada di Laurentiis’ Holiday Biscotti. I boosted the lemon zest, used almonds instead of pistachios, and left out the fruit. I would make these with most any nut, and I do sometimes add dried cherries, but I am fond of the clean simplicity of lemon and almonds. Blanched slivered almonds are especially pretty in these cookies, but any version will do in a pinch.

“Biscotti” means “twice-cooked.” The biscotti are cooked first in long logs, then sliced into individual cookies and baked again.

I prefer to keep the second baking to a minimum, so the cookies are crisp but not rock-hard. They’ll still hold up when dipped into a cup of coffee, but dipping is not a requirement.

If we’re feeling decadent, we’ll paint one side of each cookie with some melted chocolate. And as I said before, there’s always Nutella.

Lemon-Almond Biscotti

2 cups flour
1 ½ tsp. baking powder
¼ tsp. salt
¾ cup white sugar
½ cup (1 stick) butter, softened
2 eggs
grated zest of 1 lemon
¾ cup chopped almonds (preferably blanched slivered almonds)

Heat the oven to 350°F. Line a cookie sheet with parchment.

Stir together the flour, baking powder, and salt in a small bowl. In a larger bowl, beat the sugar and butter until they’re light and fluffy, 3 to 5 minutes. Beat in the eggs one at a time, then the zest. Beat in the flour just until it’s incorporated; don’t overmix. Stir in the almonds.

Divide the dough in half (no need to refrigerate, even though the dough will be sticky). Form each half into a log about 3 inches wide on the cookie sheet. (You can make just one long log, but I find it easier to manage with two.) Forming the logs is easier if your hands are damp.

Bake for 30 to 40 minutes, until the logs are just cooked through but not hard, and are pale gold on top. Cool the logs for 20 to 30 minutes (leave the oven set at 350°F). Move the logs to a cookie sheet, and save the parchment-covered cookie sheet. Cut the logs diagonally into slices about ¾-inch thick; a serrated knife and a gentle touch work best. Lay the slices flat on the cookie sheet and bake for 10 to 12 minutes longer, until the slices are golden.

Posted in baked goods, sweet stuff | Tagged , , , , | 7 Comments

Nutty parmesan shortbreads


We tend toward hibernation in the winter — this is Wisconsin, after all. But now that it’s spring we’re feeling mighty sociable. It’s time to have some options on hand for unexpected guests. For example, my pantry has cans of chickpeas, because roasted chickpeas are The Bomb, and can be made in 15 minutes.

Kale in the crisper means salty, shatteringly crisp kale chips in no time. Kale chips don’t even need a recipe; just wash and DRY the kale (very important), toss with a little olive oil, spread out in a single layer on a cookie sheet, sprinkle with salt (and whatever other seasonings you fancy), and roast in a 350°F oven until the kale is completely crisp, about 15 minutes.

To balance all those healthy treats, it’s time for a little decadence: parmesan-nut shortbreads. The dough takes minutes to put together, and can hang out in the fridge for a week or in the freezer (well wrapped) for a month or two. Since the dough is in the form of a skinny log, it can be sliced and baked mere minutes after coming out of the freezer. The shortbreads can be made several days in advance, if you hide them really well. They’re way too good to survive out in the open.

These delectable morsels are basically savory refrigerator cookies. If you’re a patient Martha Stewart type, you can manipulate the dough into a perfect cylinder. Personally, I use up all my patience with my family and dogs (where it’s put to much better use), so my logs are lumpy and misshapen, and the resulting cookies are somewhat freeform. They’re buttery, rich, slightly salty from the cheese, and crunchy from the nuts.

The shortbread is sturdy enough to hold a topping; a dab of orange marmalade or chutney provides a sweet-tangy contrast to the rich, salty cookies. A smear of herbed cream cheese or soft chevre topped with a sliver of cherry tomato would be really pretty. Frankly, the shortbreads are so fantastically satisfying all by their little selves that we usually eat them plain.

You want to use a good hard cheese here. Asiago, Romano, or even a dry, crumbly sharp Vermont cheddar are great subsitutes for the parm. Walnuts, pistachios, and almonds all work well; pecans make a slightly sweeter shortbread. To save time, use a food processor or mini chopper to chop the nuts; to make it even faster, leave the nuts out altogether, if you want. I like the herbal complexity of thyme. Use whatever herbs you prefer, or skip them. This recipe doubles easily, by the way.

Parmesan-Nut Shortbread

½ cup (1 stick) butter, softened
1 ¼ cups grated parmesan
1 cup all-purpose flour
a pinch of cayenne, optional
2 tsp. chopped fresh thyme, or ½ tsp. dried
1/2 tsp. salt
½ cup finely chopped nuts of your choice

Line a cookie sheet with parchment paper. In a small bowl, stir together the flour, cayenne (if you’re using it), thyme, and salt.

In a mixing bowl, beat the butter until it’s creamy. Beat in the parmesan, then the dry ingredients. The mixture will be crumbly. Stir in the nuts. Squeeze the dough with your hands until it comes together.

Put a square of parchment paper or waxed paper (roughly 15 inches) on the counter. Pile the dough in a long strip about 3 inches from one side. Roll the short end of the paper over the dough, and pull on the paper to create a tightly covered, smooth log. Roll the log in the rest of the paper, and twist the ends. Refrigerate the log for at least an hour, or up to several days (or wrap again in plastic wrap and freeze for up to 2 months).

Heat the oven to 400°F. Using a sharp serrated knife, cut the cold log into ¼-inch-thick slices. It helps to drag the knife through the dough using slight pressure, rather than pressing firmly straight down; that results in a flattened log.

Lay the slices flat about an inch apart on the cookie sheet and bake for 10 to 12 minutes, until the cookies are light gold. Cool on a rack and store in an airtight container at room temperature. Makes 28-30 shortbreads.

Posted in appetizers, baked goods | Tagged , , , | 3 Comments

Is it spring yet?

It’s May first in Wisconsin, and once again it’s freezing. My garden is empty and forlorn, lonely for the plants that can’t go in until this crazy cold goes away for good.

We decided to pretend it was a nice spring Saturday, and grill out. Luke was at a friend’s house, studying for their upcoming AP exams, so it was just Tom and me (and the pups, of course). We cranked the iPod (nothing like some Bruno Mars and then a little Stevie Wonder to get the weekend mood going). I poured a glass of wine, Tom made a drink, and we slowly made dinner.

This is my idea of heaven, by the way: the grill heating on the deck, great music in the background, great company (today just me and Tom, but that’s enough) while we prepare a delicious meal.

Today’s menu: green salad with chickpeas and gorgonzola, drizzled with a tangy balsamic/Dijon vinaigrette, and topped with slices of grilled flank steak. As an accompaniment, I made cheddar-chive biscuits.


In fact, the entire meal started with those biscuits, since they feature the only plant in my garden ready for harvest: chives. The Silver Palate cookbook was my inspiration. Their Jalapeño-Cheddar Biscuits make frequent appearances in our house. I used exra-sharp cheddar instead of the pepper-jack, and added minced chives from the garden. There wasn’t any half-and-half in the fridge, so I used sour cream mixed with whole milk.

These morsels of deliciousness are not what you’d call good for you (except, perhaps, spiritually), but we were, after all, having salad for dinner. I‘ve never mastered those biscuits that split into layers, but these are light, flaky, and rich enough that we don’t miss them.

When making the salads, we went a little overboard with the veg — arugula and butter lettuce, grape tomatoes, chunks of avocado, and julienned onion and yellow bell pepper sautéed until tender and golden. But it all harmonized quite well: the sweet onions and peppers were in balance with the tangy vinaigrette, the acid from the vinaigrette balanced the richness of the beef and cheese. All in all, a beautiful, satisfying, and relatively healthy dinner. If you don’t count the biscuits.

Cheddar-Chive Biscuits, adapted from The Silver Palate: The New Basics
makes eight 2-inch biscuits

1 cup AP flour
pinch of sugar
¼ tsp. salt
2 tsp. baking powder
4 tbs. (1/2 stick) butter, cold, cut into small chunks
6 tbs. half-and-half (I used 3 tbs. sour cream and 3 tbs. whole milk)
½ cup (2 oz.) grated sharp cheddar
2 tbs. minced chives

Heat the oven to 425°F. Stir together the flour, sugar, salt, and baking powder in a mixing bowl. Using your fingers, smear the butter into the flour mixture until the mixture resembles peas. Don’t spend too much time on this part; you want the butter to remain fairly cold. You can use a pastry cutter or two butter knives instead, if you prefer.

Stir in the half-and-half just until combined. (You can use your hands here again, but it is seriously messy. A wooden spoon works very well too.) Add the cheese and chives and give a quick stir.

Dump the dough out onto a lightly floured countertop. Knead a few times, just to bring the dough together, and pat out into a rectangle about 1 inch thick. Cut into circles about 2 inches in diameter with a cookie cutter (I use a juice glass). Dip the cutter (or glass) into flour before each cut, and rotate the cutter several times to help to release the dough.

Place the circles on a cookie sheet about 1 inch apart and bake for 15 minutes, until they’re puffed and light gold on top. They’re at their best eaten while still warm.

Posted in baked goods, sides | Tagged , , , | Leave a comment

Bread!

It’s the very end of April, and it’s supposed to be spring, even here in Great Lakes territory. Last year at this time, my lilacs were sporting grape-colored buds; this year, they don’t even have leaves. This morning I shivered in spitting drizzle while the puppies romped at the dog park. When we got home, the girls napped on the couch, and I decided it was time for some comfort food.

I am not a baker. It’s partly from inexperience and partly a perpetual inability to resist fiddling with a recipe, any recipe. But there’s nothing like the warm scent of bread baking in your own oven, and I’m a sucker for a great crust. There are no pictures of the process here (I apologize!) because I did not have a great deal of confidence that this would actually work.

I searched my favorite blogs for a tasty bread. As so often happens, Deb at Smitten Kitchen came through with her Rustic White Bread. Her recipe made two loaves, but I halved it. She helpfully gives directions for making the dough by hand, with a stand mixer, or in the food processor. I opted for the food processor, because A. I don’t have a stand mixer (yet), and B. the food processor version meant no kneading!

I used bread flour instead of all-purpose (AP) flour, and substituted ½ cup of that for ½ cup whole wheat flour, just to add a little whole grain to our lives. I also added a teaspoon of Penzey’s Tuscan Sunset, a fancy name for a blend of herbs, lemon zest and garlic. (Told you I couldn’t leave a good recipe alone.)

The dough came together very easily. I allowed two hours for the first rise and an hour and a half for the second. The dough did not fully double in size either time, but it was, as I’d said, a cold, damp day.

I followed the baking directions exactly, and the result was absolutely gorgeous, if I say so myself. In fact, I told Luke I wanted him to spend some time admiring the golden crust and fabulously yeasty aroma, because I was worried the loaf would be all looks and no substance. But it actually was delicious, thank goodness (and Deb).

In the past, I’ve had issues with my bread being too dry. By using the food processor, I added less flour than I would have if I’d kneaded by hand. That probably accounted for the crackly, firm crust and moist (but not heavy) interior. I’d used the recommended 2 teaspoons of salt for one loaf. Tom thought the loaf, while excellent, was a tad too salty; Luke thought the salt level was fine. I’ve left the salt as is in the recipe below, but I may reduce it to 1 ½ teaspoons next time.

Rustic Loaf (adapted from Smitten Kitchen)

1 ½ tsp. active dry yeast
1 cup warm water
1 ¾ cups bread flour (or unbleached flour), plus up to ½ cup as    needed
½ cup whole wheat flour
2 tsp. salt
1 tsp. salt-free seasoning blend such as Penzey’s Tuscan Sunset, optional

Stir the yeast into the warm water; set aside for 2 to 3 minutes. Meanwhile, fit your food processor with a metal blade. Pulse 1 ¾ cups bread flour with the whole wheat flour, salt, and seasoning (if you’re using it) just until they’re all blended. Add the yeast and water and pulse until the dough forms a ball; if it seems too sticky to do that, add a tablespoon or two more of the bread flour. Once the dough forms a ball, let it rest in the food processor for 5 minutes.

Put about 2 tsp. oil in the bottom of a large bowl. When the 5 minutes are up, run the food processor continuously for 30 seconds. Then scrape the dough into the oiled bowl. Turn the dough over to oil both sides, cover with a damp towel, and set in a warm place to rise. It’ll take 1 to 2 hours to double in size, depending on warmth of the day.

Line a cookie sheet with parchment, then sprinkle liberally with cornmeal; set aside. Dust the counter with flour. Punch the dough down and turn out onto the floured counter. Pat into a fairly thin rectangle (mine was about 11 x 14 inches). Roll into a fat log. Transfer the log to the cookie sheet. Dust it liberally with flour, cover with a damp towel again, and set in a warm place to rise. (I let mine rise for just over an hour and a half, and it could have used another 30 minutes on this cold, damp day.)

Half an hour before you’re ready to bake, heat the oven to 500°F (yes, that hot), with one rack at the bottom and one in the middle. When you are ready to bake, place an extra pan or cookie sheet on the bottom rack to help deflect the heat and keep the bottom of your bread from burning. (I skipped this step, because I have an old gas oven that tends to run colder than the set temperature.) Using a clean razor blade or a very sharp knife, slash the bread at a diagonal 3 or 4 times. Put the bread in the oven and immediately lower the temperature to 450°F. Set your timer for 20 minutes.

After 20 minutes, lower the temperature once more to 350°F. Bake for 20 to 30 minutes longer, until the internal temperature reaches 220°F (I confess I did not take the temperature of the bread, but as my bread could have used 5 more minutes in the oven, I probably should have.)

Posted in baked goods, sides | 1 Comment

Sweet-salty-spicy nuts

I spent years (okay, maybe months) looking for a spiced nut recipe. I tried toasting the nuts in oil or butter and spices. Maybe I was doing something wrong, but the seasoning seemed to slide off those slick almonds, leaving greasy, bland nuts. Not what I had in mind.

The secret is to use egg whites as the glue to bond the seasonings with the nuts.  I start with a base of one egg white, three tablespoons of white sugar, and two teaspoons of salt to season two cups of nuts. Then it’s time to go crazy.

Today’s version features vindaloo*, but use what you like — Chinese five-spice, cinnamon, ginger, cloves, cayenne (go easy on that one), ginger, cumin — in combination or on their own.

[*vindallo is a mixture of coriander, cinnamon, chilies, ginger, cardamom, pepper and cloves. I get my vindaloo from Penzey’s. I get all my dried herbs, spices and blends from Penzey’s, in fact; their quality is superb and their prices are reasonable. ]

You need to whisk the egg white to break it up, but we’re talking foamy bubbles, not stiff peaks. Then dump in the nuts (almonds pecans, hazelnuts — whatever) and stir until the nuts are completely coated in the egg whites. Stir in the seasoning mixture, spread on an oiled cookie sheet, and pop in the oven. Five minutes of prep, 20 minutes in the oven, and you’re done.

One do-as-I-say-not-as-I-do tip: After 20 minutes (25 tops), take them out of the oven. They won’t look done at all. They won’t be anything close to crisp. It doesn’t matter. All that crunchiness develops after they cool. The first time I made these, I left them in the oven for close to an hour, waiting for that crunch to appear. By the time I took them out, they were shriveled husks of their former nutty selves.

I made them the day before a big summer party once. Humidity levels skyrocketed on party day, and the nuts were a sticky mess. I popped them back in the oven for 5 minutes, and they crisped right up.

Let them cool completely on the cookie sheet, but give them a stir now and then. Once they’re at room temperature, they will be crunchy morsels of heaven: slightly salty, slightly sweet, and as spicy as you want them to be.

A pretty jar of spiced nuts makes a lovely small gift, and is just the thing to bring to a party when the hosts say, “Oh, we don’t need a thing! Just bring yourselves!”

Sweet-Salty-Spicy Nuts

3 tbs. sugar
2 tsp. salt
1-2 tsp. spices (I used ¾ tsp. vindaloo, ¼ tsp. cardamom, ¼ tsp.    cayenne, and a few grinds of black pepper in this batch)
1 egg white
2 cups nuts (I used almonds and pecan halves)

Heat the oven to 325°F. Lightly oil a cookie sheet.

In a small bowl, stir together the sugar, salt and spices. In a mixing bowl, whisk the egg white until frothy. Stir in the nuts until every nut is coated in the egg white. Stir in the seasoning until very well combined. Spread the mixture onto the oiled cookie sheet; you want one layer of nuts, not a pile.

Roast for 10 minutes; give a good stir and roast for 10 to 15 minutes longer. Cool them on the cookie sheet, stirring occasionally, until there’s no residual heat left and the nuts are crisp.

Store them at room temperature. If it’s not humid, you can just set them out in an open bowl. Otherwise, pack them up in a covered container. They’ll last for two weeks, if you hide them. This recipe doubles easily.

Posted in appetizers | Tagged , , , | 5 Comments

More roasted veggies: butternut squash

Like so many American foodies, I grew up watching Julia Child on television. When my son was really young, our Saturday pre-dinner ritual was watching Julia and Jacques: Cooking at Home. The affection these two master chefs had for each other was palpable. At the end of each episode, Julia would sign off with her iconic “Bon appétit!” and Jacques Pepin would add, in his heavy French accent, “ ’appy coo-king!” This has become Tom’s and my catchphrase, our own fond farewell.

In one of those episodes*, a guest chef made a savory butternut squash dish. I’ve never been fond of overly sugary, overly rich squash, pumpkin, or sweet potato dishes, so this I had to try.

Such a revelation! The sweetness was still there, but it was secondary to the robust, almost floral taste of the squash. The caramelized shallots and little bit of garlic played a supporting role. The cubes of squash have enough natural sugar and moisture that they need very little fat to caramelize beautifully all by their own selves.

*(Okay, it may not have been the Julia and Jacques show specifically, but it was an episode of one of Julia Child’s shows.)

Anyone who has tackled one of these bad boys knows that the hardest part is the prep. Trimming and chopping a butternut squash takes strength and patience. I find that peeling it first with a good vegetable peeler makes the chopping much easier. And I still can’t believe how many years I risked life and limb trying to cut it first, or to peel it with a knife.

Most of the time I sauté the squash in a large skillet, but roasting it in the oven is a little less hands-on and frees up a burner, if you’re in need of one. It’s delicious either way.

I had a lovely bowl of leftover roasted squash recently. Soup time! A chopped onion, a few chopped carrots, a clove of garlic and a minced Fresno chile went into a stockpot, to be sautéed in a little oil. (Did I mention that I’m currently addicted to Fresnos? I put them in everything these days, but here I really thought their sweet perfumy heat would blend well with the squash and carrots.) I tossed in a cubed potato and covered it all with chicken stock. Once the veg were tender, the leftover squash joined the party. A brisk whir with the stick blender, a dollop of Greek yogurt, and voilá — sunset-colored, sweet-spicy soup in half an hour.

Roasted Butternut Squash with Thyme and Shallots

1 medium butternut squash
1 tbs. olive oil
1 medium shallot, chopped
1 clove garlic, minced
1 tbs. chopped fresh thyme, or 1 tsp. dried ( you could use basil,  tarragon or rosemary instead, if you prefer)
salt and pepper
1 tsp. brown sugar

Heat the oven to 425°F. Peel the squash with a vegetable peeler, then cut off the narrow end right where it begins to flare out. Cut the wider part in half, scoop out and discard the seeds. Cut all the squash into 1-inch cubes. Dump them on a cookie sheet and sprinkle with the olive oil, shallot, garlic and thyme. Add a few pinches of salt and pepper. Toss with your hands to distribute everything evenly, and spread them in a single layer.

Roast for about 20 minutes. Sprinkle the squash with the brown sugar, give it a stir, and roast for another 10 to 15 minutes until the squash is tender and browned here and there. Makes 4-6 side-dish servings, depending upon the size of the squash.

Posted in sides, soups, veggies | Tagged , , | 1 Comment

Not your grandma’s molasses cookies

I brought these cookies to my son’s piano recital several years ago. People would look at these humble brown circles doubtfully: What were they? Too light to be chocolate, too dark for peanut butter. But then an intrepid soul picked up a cookie and took a bite. One beatific smile was all it took—the cookies were gone in five minutes.

These modest, unassuming discs hide a secret: they are packed with explosive flavor. Molasses, brown sugar, a touch of butter, and layers of spices combine in a way that’s rich, deep and complex.

As far as I can figure, this recipe originally came from my grandmother. My mom has made them her whole adult life, as have I. The recipe has morphed over the years (big surprise there; since when do I leave a recipe alone?).

That time I made them for the piano recital? I’d forgotten that I was supposed to bring treats until an hour before the recital. Oops! I made these because A. they’re my favorite cookies, hands down; B. the dough doesn’t need refrigerating; and C. I had the ingredients—or so I thought. My mother always made molasses cookies with shortening. I had exactly 1/3 cup of Crisco in the house, not even enough for a half-batch. I filled the gap with softened butter. Amazing! They were even better.

So of course, the next time I tried making them with all butter. Not so much. The butter battled with the spices. Back to half butter, half shortening, and that’s where we stay.

My mom rolls the little balls of dough in sugar before baking. I tried using demerera sugar (Sugar in the Raw), thinking it would add extra crunch. All it did was melt into an odd-textured shell. Back to plain white sugar, but now I add a small amount of the same spices I use in the dough.

Sometimes I stick to the traditional mix of cinnamon, cloves, ginger and nutmeg, usually with a sneaky few grinds of black pepper. Sometimes I’ll add about ¼ teaspoon of coriander, cardamom, Chinese five-spice, vindaloo or other sweet-savory spice blends. They’re all good. I haven’t tried adding chile powder yet, since the ginger and black pepper add heat, but it would be fun to experiment with a tiny pinch of cayenne.

It’s highly possible the original cookie was only sweetened with white sugar and molasses. I use white and brown sugars in addition to the very necessary molasses.

Trying to take the cookies off the cookie sheet too soon gives you a pile of tasty crumbs and mashed cookies. (I learned this the hard way, can you tell?)  What works best is to take the cookies out when you think they could really use 1 more minute in the oven, then leave them alone on the cookie sheet for a few minutes. They finish cooking while you stand by impatiently, and they firm up to boot.

Try them as a spicy sidekick to a dish of ice cream, individual chocolate mousses (future post!), or strawberry granita (also future post!); top them with a dollop of Nutella or bitter orange marmalade; make little sandwiches with cream cheese frosting. Or just savor their complex flavors all on their own.

Not Your Grandma’s Molasses Cookies

2 cups flour
2 tsp. baking soda
½ tsp. salt
½ tsp. cloves
½ tsp. ground ginger
1 tsp. cinnamon
½  tsp. nutmeg
a few grinds black pepper
½ cup brown sugar, packed
½ cup white sugar
¾ cup shortening + butter (roughly half of each)
1 egg
¼ cup molasses
Spiced sugar for rolling: ½ cup white sugar, ½ tsp. cinnamon, plus a  pinch each of your favorite spices

Heat the oven to 400°F. Line a cookie sheet with parchment.

In a small bowl, stir together the flour, baking soda, salt and spices.

Dump the brown and white sugars in a big mixing bowl. Fill a ¾-cup measuring cup half with softened butter and half with shortening for a total of ¾ cup fat. (I use Pampered Chef’s adjustable measuring cup set on ¾ cup.) Scrape the butter-shortening into the bowl with the sugars. Beat this mixture with a mixer for a few minutes until it’s fluffy and there aren’t any lumps of sugar. Beat in the egg, then the molasses. (If you used the adjustable measuring cup for the fats, re-set the cup to ¼ cup and use it to measure the molasses; every drop of that sticky molasses will slide right out of the still-greasy measuring cup.)

Stir in dry ingredients just until they’re completely incorporated—don’t overbeat. In a small bowl, mix the rolling sugar with the spices.

Roll rounded teaspoons of the dough into balls, then roll the balls in the rolling sugar. (Yes, this is a sticky, messy job. Art calls for sacrifice, people.) Place the sugared balls about 2 inches apart on the cookie sheet; they will spread as they cook. Bake for about 7 minutes, until there are cracks on the top but they look like they could use 1 more minute. Let the cookies cool on the sheet for 2 to 3 minutes, then move the cookies to a rack to cool completely.

This recipe makes about 5 dozen cookies. They will keep for several days at room temperature in a tightly covered container, but only if you hide them away.

Posted in baked goods, sweet stuff | Tagged , , , | 5 Comments